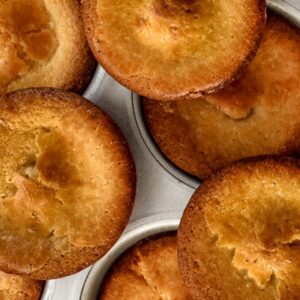
Mini Hawaiian Butter Mochi recipe lightly sweetened with condensed milk with hints of vanilla & coconut. Chewy on the inside with crispy and crunchy edges on the outside! Plus, they're mochi muffins that can make them even better because there's more crispy edges!
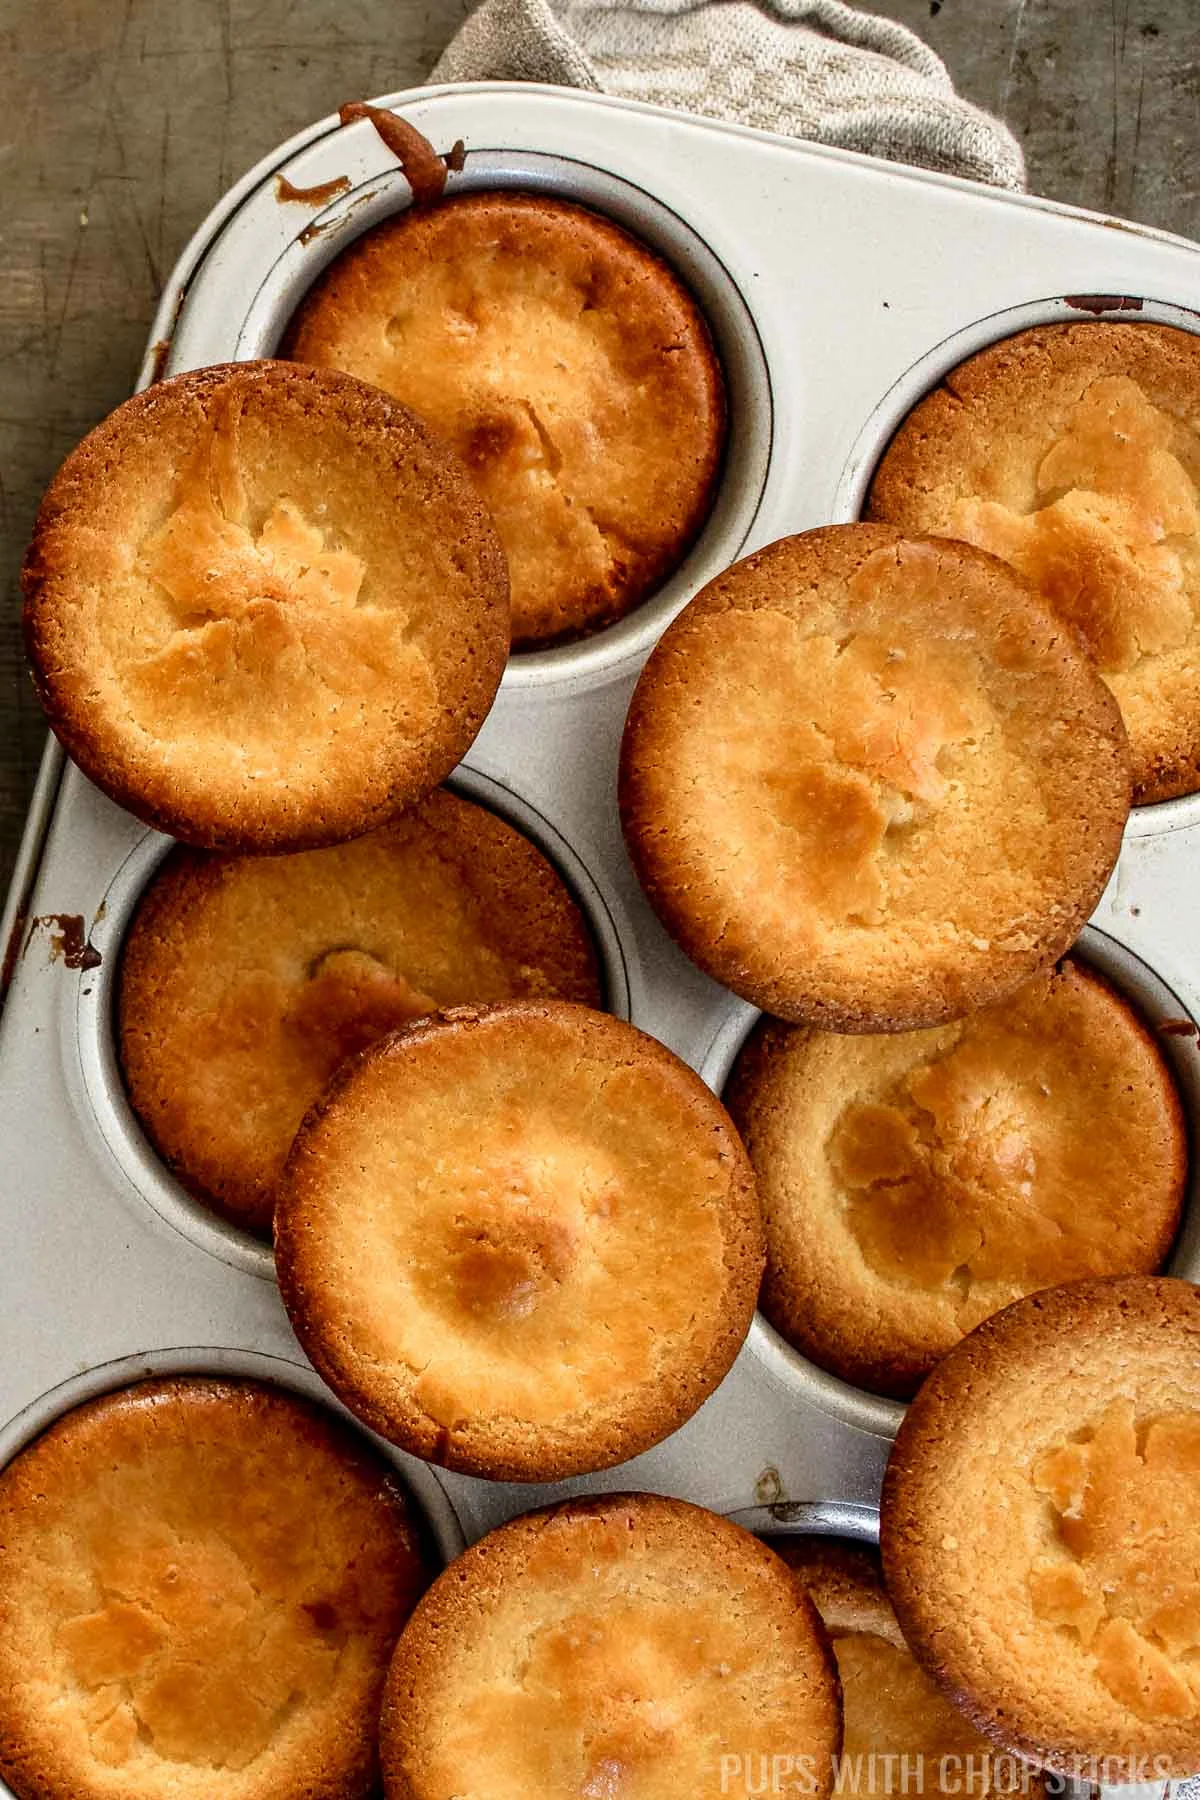
Table of Contents
- What is Hawaiian Butter Mochi?
- Why You’ll Love This Hawaiian Butter Mochi Recipe
- Ingredients You’ll Need to Make Mochi Muffins
- What Can I Substitute for Mochiko?
- How to Make Hawaiian Butter Mochi
- Joyce’s Tips For Making the Best Hawaiian Butter Mochi
- Serving Suggestions
- Butter Mochi Variations
- How to Store Butter Mochi
- FAQs
- More Desserts You May Like
- Recipe Card
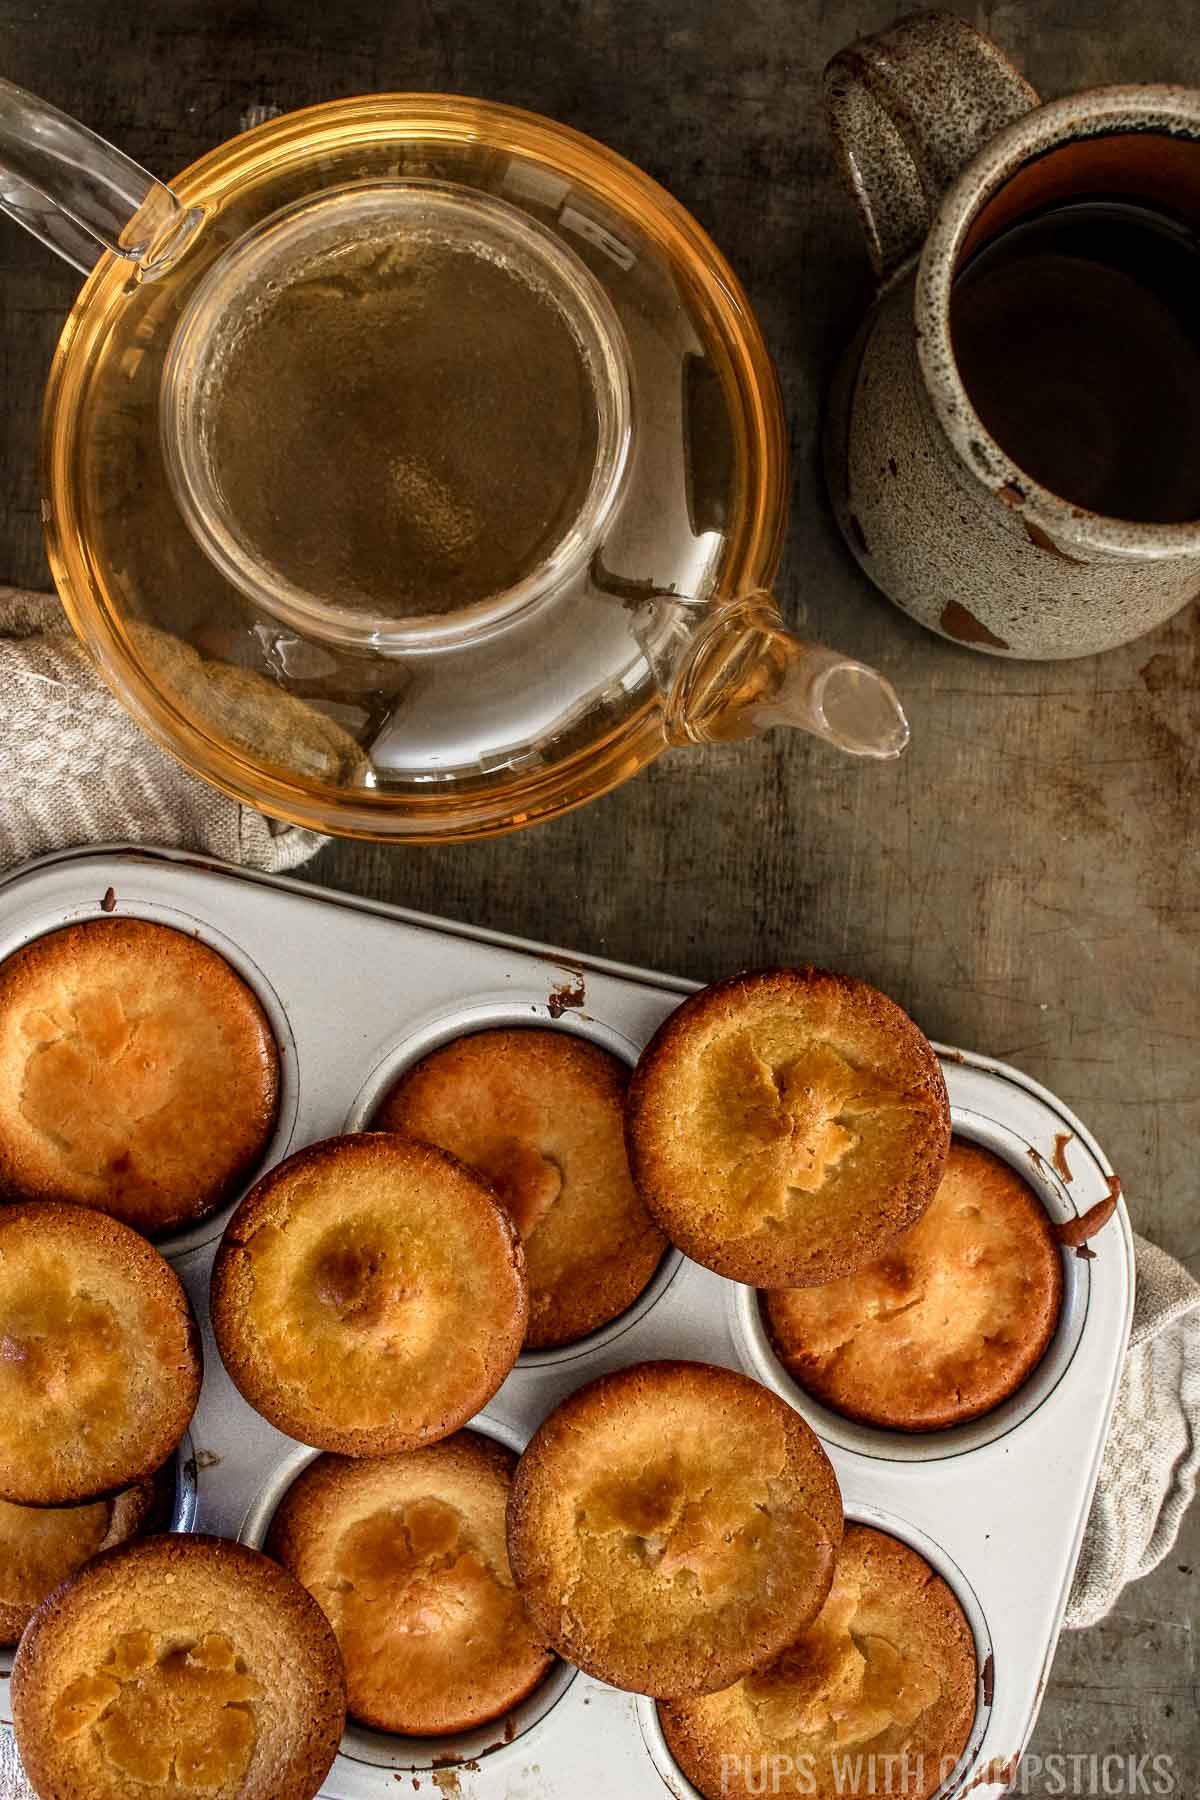
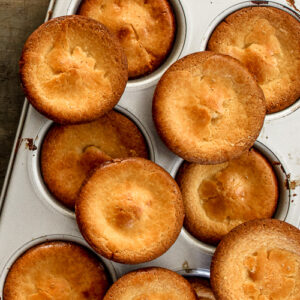
My favorite part of this Hawaiian butter mochi treat is the crispy edges and the satisfying chewiness in the center. Whenever I make this, everyone always seems to fight for the corner pieces so why not bake this in a muffin tin so that everyone gets corner pieces?
If you have never had butter mochi, I highly urge you to give it a try, do keep in mind that they are lightly sweetened so they are not as indulgent as a fudgy brownie but they are wonderful with a cup of tea/coffee or as an afternoon snack.
And the best part is that this recipe is for mochi muffins which are perfectly chewy with more crispy edges all around!
If you look at my list of desserts, you'll notice that I also love using condensed milk to sweeten them. It gives any desserts a more buttery-rich flavor and it gives it an amazing scent that wafts throughout the house. If you have extra condensed milk, try using it on our easy moist banana bread that uses yellow roasted bananas!
What is Hawaiian Butter Mochi?
Butter mochi originates from Hawaii and is a popular snack made with Mochiko flour (sweet rice flour), sugar, eggs, and coconut milk. They are traditionally baked in a square or rectangular baking pan and cut into squares.
They are typically crispy on the outside, chewy, and buttery in the middle. What makes butter mochi stand out from any other brownie or bar is its satisfying and chewy center combined with its coconut and vanilla flavor.

Why You’ll Love This Hawaiian Butter Mochi Recipe
- Easy to Make: This Hawaiian butter mochi recipe requires simple ingredients. It is as easy as mixing together the wet and dry ingredients separately, combining them, and then baking the batter. No complicated steps or techniques involved!
- Cozy and Tasty: The recipe uses a variety of flavors like vanilla extract, coconut cream, and condensed milk which give the butter mochi its warm and cozy taste.
- Classic Chewy Texture With More Crispy Edges: The recipe yields a mochi that's chewy on the inside and crispy on the outside, providing a satisfying contrast in texture with each bite and since it's made in a muffin tin, there's more crispy edges than ever.
- Perfect for All Occasions: This recipe is a surefire crowd-pleaser. Whether you're hosting a party or bringing a dish to a potluck, these butter mochi cakes are perfect for all occasions. They reheat very well too, so you can also make them ahead of time.
Ingredients You’ll Need to Make Mochi Muffins
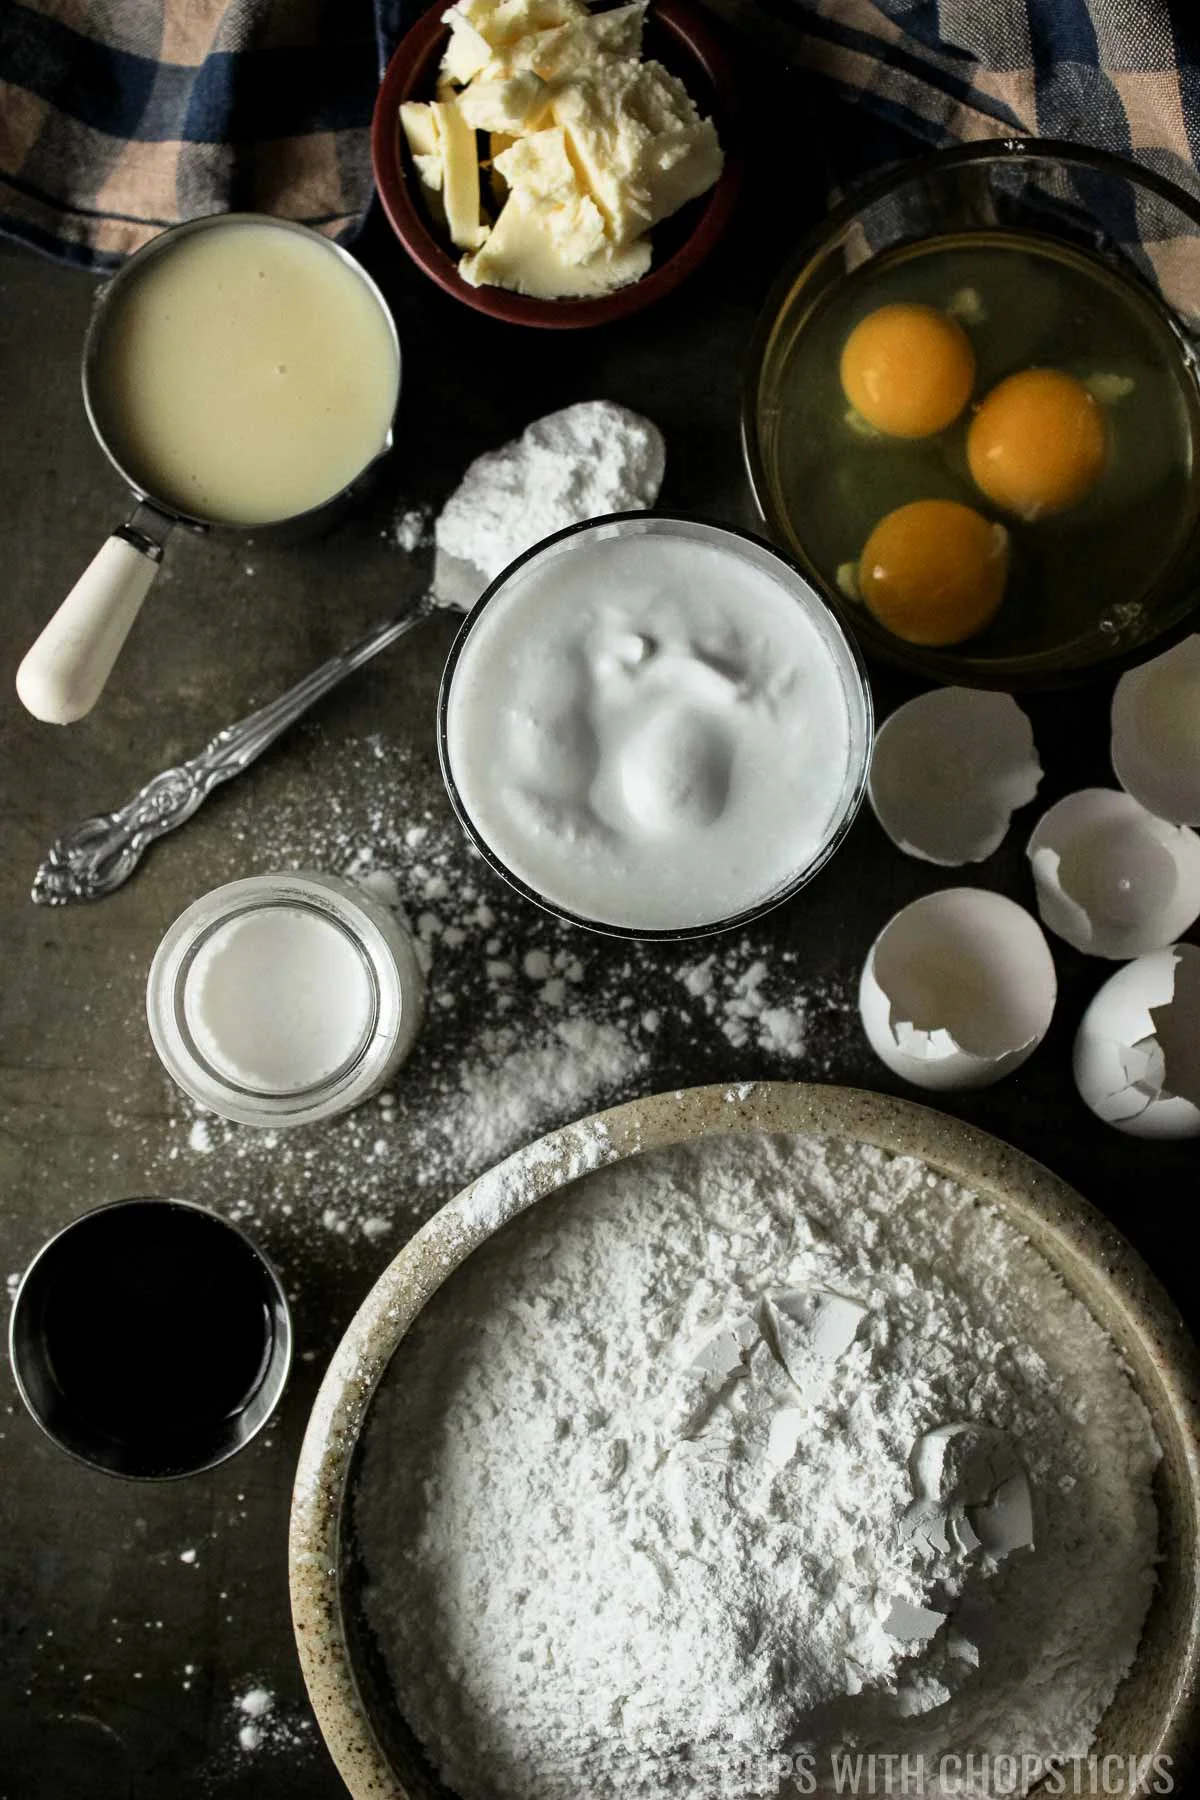
Here's an overview of the specific ingredients for this Hawaiian butter mochi recipe. For the exact ingredients and measurements, please scroll to the recipe card below.
- Coconut Cream: I like to use coconut cream over coconut milk because I find that it has a stronger coconut flavor and it contains a bit more fat as well which gives the cakes a crisper texture. If you cannot find coconut cream, try to find coconut milk with a higher fat content - I find those are generally thicker and have a stronger coconut flavor.
- Sweet Rice Flour (glutinous rice flour): I like to use Koda Farms Mochiko Sweet Rice Flour for this recipe and I find that it produces the best results from all the glutinous rice flours I have used, but depending on where you are, it may be more difficult to find. (Note : Although it is labeled as ' Sweet Rice Flour' this is still glutinous rice flour.) If you cannot find this particular brand in the store, please see below in the next section for my recommendation for what to substitute it with along with the changes you may need to make. Make sure you are using glutinous rice flour and not just rice flour.
- Sweetened Condensed Milk: To sweeten this mochi cake, I like to use sweetened condensed milk. I find it gives the butter mochi a bit more of a creamy flavor and it's just the right amount of sweetness without being overly sweet.
- Eggs: I use large eggs for all my cooking and baking. I like to use room-temperature eggs for this recipe because I find it makes the edges crispier since the batter is at room temperature before it goes into the oven.
- Vanilla: I like to use real vanilla extract but artificial vanilla extract works just well for this recipe.
- Unsalted Butter: The melted unsalted butter in this recipe acts as the primary fat, lending a rich, buttery flavor to the mochi. It also helps make the edges of the cake crispy. I don't recommend substituting it.
What Can I Substitute for Mochiko?

I still highly recommend using Mochiko Sweet Rice Flour to make the crispiest and chewiest butter mochi but I understand that it can be hard to find depending on where you live.
I myself sometimes have a hard time finding it as well since they are always sold out where I live, so I have tested this recipe with the other brands and types of glutinous rice flours, mainly the more common ones that come in a plastic bag packaging that comes from Thailand and I'm glad to say that the recipe can be substituted with it with minor tweaks to the recipe.
- Make sure you are purchasing glutinous rice flour and not rice flour. Usually, the glutinous rice flour ones are packaged with green writing and the rice flour is packaged with red writing.
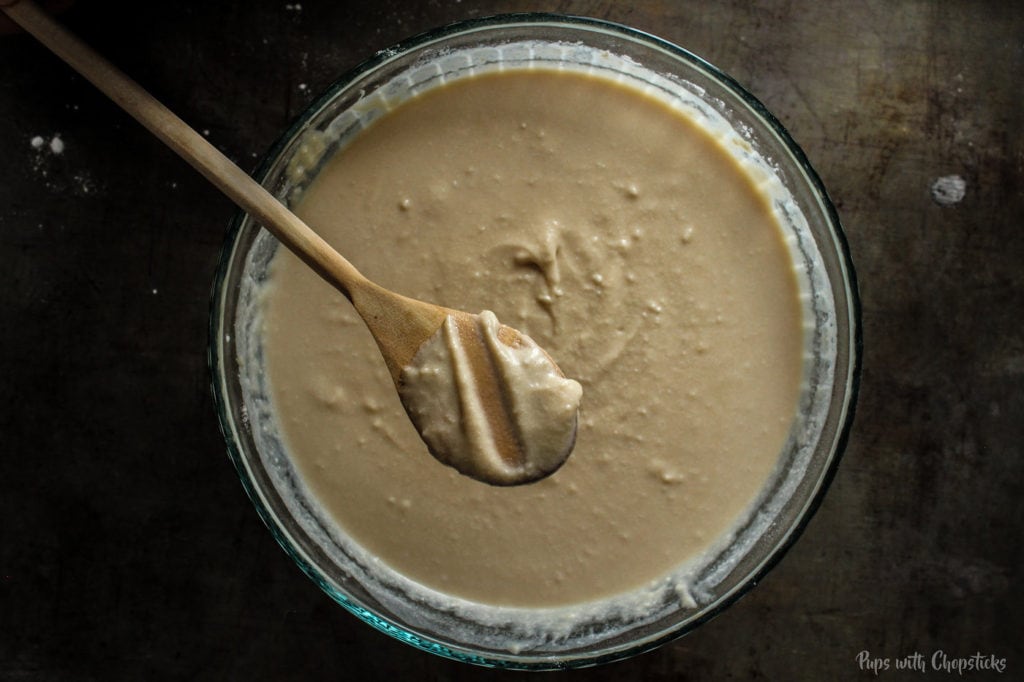
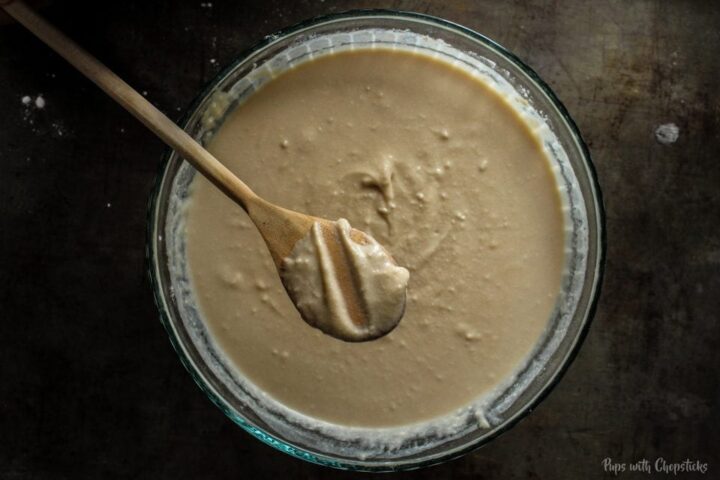
- Make sure to check how much flour comes in each bag. Most of the bagged glutinous rice flour from Thailand comes in 1 lb bags (16 oz) but some brands come with 50 gm less flour so you may need to adjust the amount of milk you add to the recipe to make sure the batter is not runny. Instead of adding 1 cup of milk, add the milk ¼ cup at a time until you get a pancake batter consistency. Coat the back of a wooden spoon with the batter, and run your finger through the batter. If it leaves a clear line like the photo below, then you're good. If the line doesn't form, the batter may be too runny and you have put too much milk.
- Butter mochi cake is very forgiving. My assumption is because of the texture of this cake - it's chewy and holds moisture well from the rice flour's starchiness, so it's kinda hard to mess up that texture with minor substitutions. As long as your end product has the consistency of a pancake batter - you're good!
- Keep in mind that the bagged glutinous rice flour is not a perfect substitution but it's pretty darn close and honestly just as tasty. The biggest difference I noticed is that butter mochi made with the bagged glutinous rice flour is a little less chewy.
How to Make Hawaiian Butter Mochi
- Combine the Wet Ingredients Except for the Milk - Melt the butter and coconut cream in the microwave for a few seconds (Approximately 45 seconds but do this 10-15 seconds at a time, butter goes NUTS in the microwave - I did this for 60 seconds straight and half the butter ended up outside of the bowl. Cleaning up butter is not fun.) Add the melted butter and cream into a large bowl and condensed milk, vanilla, and mix well. Add in the eggs 1 at a time and mix well.
- Add in the Dry Ingredients & Mix Well - In a large mixing bowl, add in the flour, sugar, and baking powder and mix well. At first, you will see lumps but if you keep mixing, it will become a smooth batter - No need for electric mixers, I found using the whisk was enough.
- Add in the Milk - I added the milk last because depending on what type of flour or coconut cream/milk you use, you want to control how much milk to add to get the right consistency. You can slowly add, but you can't take it out. If you are following the recipe without substitutions then 1 cup of milk is good, but if you substitute the coconut cream for coconut milk then add in ¼ cup of milk at a time until you reach a nice pancake batter consistency. Run your fingers through the batter and if it holds its shape and it's not too runny and not too thick then you're good! I actually found that if you let your batter rest for 15-20 minutes, it gave the cakes an even better texture!
- Butter the Muffin Tin & Bake - If you're as obsessed as me, then you want maximum crispiness. Muffin tin all the way for this. Butter your muffin tins liberally and pour approximately ¼ cup of batter in each muffin cup and bake them for 45 minutes to an hour at 350F (177C) until golden brown on the middle rack in the oven. Once you are finished baking it, if you can wait that long (I couldn't!), let them cool on a wire rack before diving in so that it has a chance to form its crunchy exterior.
Joyce’s Tips For Making the Best Hawaiian Butter Mochi
- Use Room Temperature Ingredients: Try to have the milk and eggs at room temperature before you start making this recipe. I find that this makes the cake edges crispier since the batter has not been cooled, so it takes less time to cook and crisp up.
- Allow Mochi to Cool: After it has been baked, make sure you let the butter mochi fully cool before eating. Letting it cool lets the crusty outer layer get crispier, and it firms up the inside so that it becomes chewier.
- Properly Grease the Baking Pan: If you don't have a non-stick muffin pan, grease the pan very well with butter before pouring the batter into each muffin cup. I like to grease each muffin cup with butter and coat it with coarse semolina or cornmeal before pouring the batter into each cup. Just remember to shake out the excess semolina/cornmeal into the sink so that you don't have a thick layer on the bottom. The semolina/cornmeal gives each mini cake an even crispier bottom and it lets each cake easily pop out of the pan.
- Adjust Batter Consistency: Remember, some coconut creams are thicker than others. If your batter is too thick due to a creamier coconut cream, add a tablespoon or two of milk to thin it down.
Serving Suggestions
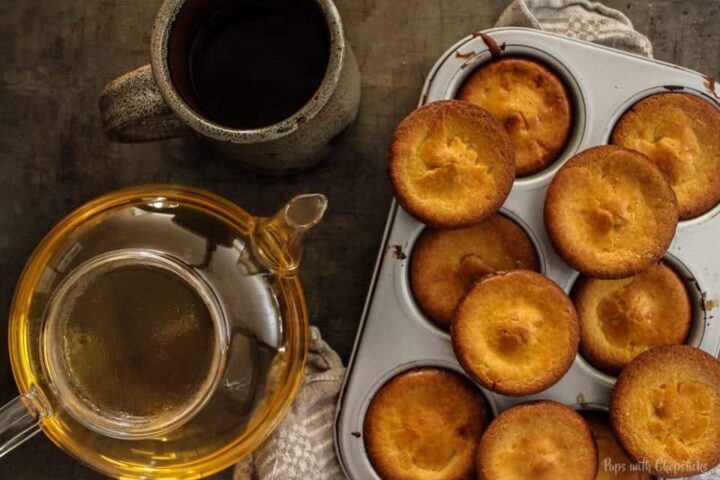
- For a delicious morning treat, pair your Hawaiian butter mochi with a cup of freshly brewed coffee. The sweet and chewy mochi cake with a hint of coconut flavor is a perfect match for the robust taste of coffee.
- Hawaiian butter mochi makes a great picnic snack. Just wrap individual pieces in parchment paper and enjoy this sweet treat under the sun.
- For a late-night indulgence, enjoy your Hawaiian butter mochi with a glass of cold milk. The creamy milk balances out the sweetness of the mochi cake, making it a perfect end to your day.
- Want to impress your guests at a dinner party? Serve the Hawaiian butter mochi as a dessert, garnished with fresh berries and a dusting of powdered sugar. It is a sweet ending that's sure to impress.
- Hawaiian butter mochi can also be a great afternoon snack. Enjoy it with a cup of green tea for a relaxing break from your busy day. The subtle bitterness of the tea pairs well with the sweet and sticky mochi.
Butter Mochi Variations
- Salted Egg: We tried adding about 8 salted duck egg yolks (they were about 1 inch in size) and they turned out fantastic. You will need to add 1 extra tablespoon of sugar to counterbalance the saltiness and make sure you mash them very well with a fork before you mix it in.
- Pandan: Start by adding ½ tablespoon of pandan extract. There are a lot of different kinds of pandan extract and some are stronger than others. I have used some that were pre-sweetened and some that were very strong and floral. You can add ½ tablespoon more if your first batch wasn't strong enough.
- Ube: Add in 1 tablespoon of ube extract and mix well.
- Matcha: Mix in 1 tablespoon of high-quality matcha into the dry mix before mixing it into the wet ingredients so that it will mix evenly.
- Peanut Butter: Mix in ¼ to ½ cup of smooth peanut butter while you are mixing the butter into the coconut cream.
How to Store Butter Mochi
These keep very well in an air-tight container but make sure you keep it in the fridge since there is milk in it. They will keep for about a week.
To crisp them up again, pop them in the oven at 350F (177C) for about 15 minutes and then let it cool so that it can get crispy again. I personally think they taste even better the next day.
To freeze butter mochi, you can wrap each one individually in plastic wrap and store it in an air-tight container. Keep it for up to 3 months. To warm them up again, thaw them in the fridge until they are soft again, and then bake them in the oven at 350f for about 15 minutes.
FAQs
Yes, they are! Hawaiian butter mochis are made with mochiko flour, which is a type of glutinous rice flour. This flour is naturally gluten-free, making these treats a great option for those following a gluten-free diet.
Since there is milk in them, it's safest to keep them refrigerated. To warm them up and make them crispy again, bake them in the oven for 15 minutes at 350f.
Yes, they can be frozen! You can wrap each one individually in plastic wrap and store it in an air-tight container. Keep it for up to 3 months. To warm them up again, thaw them in the fridge until they are soft again, and then bake them in the oven at 350f for about 15 minutes.
They last for about 1 week in the fridge stored in an air-tight container.
You'll know it's done when the outsides are golden brown and crispy. Butter mochis are very forgiving and are very difficult to overcook. Once they are golden brown, the insides will be cooked all the way through as well, but make sure you check at the 30 minutes mark to prevent it from burning.
To check if they are underdone, you can use a toothpick and insert it in the middle of a few mochis, if it comes out clean then the center has been fully cooked.
More Desserts You May Like
- Black Sesame Creme Brulee
- Roasted Banana Banana Bread
- Black Sesame Chocolate Ruffled Milk Pie
- Chewy Five Spice Ginger Molasses Cookies
- Black Sesame Cheese Cake
- Candy Cane Chocolate Crepe Cake
If you made this Hawaiian butter mochi recipe, I want to see! Follow Pups with Chopsticks on Instagram, snap a photo, and tag and hashtag it with @pupswithchopsticks and #pupswithchopsticks. I love to know what you are making!
Please also consider leaving a ⭐⭐⭐⭐⭐ rating and a comment to tell me how it went! I'd love to hear from you if you made this!
If you like my recipes and want to be updated on when new ones come out, please consider subscribing to my newsletter (we don't spam) and follow along on Instagram, Facebook, and Pinterest for all of my latest recipes!
Recipe Card
Chewy Hawaiian Butter Mochi
Joyce's Recipe Notes
- If you are not using Koda Farms Mochiko Sweet Rice Flour, the only substitution I have tested and recommend is using the bagged glutinous rice flour made from Thailand. Make sure to check how much flour comes in each bag. Most of the bagged glutinous rice flour from Thailand comes in 1 lb bags (16 oz) but some brands come with 50 gm less flour so you may need to adjust the amount of milk you add to the recipe to make sure the batter is not runny. Instead of adding 1 cup of milk, add the milk ¼ cup at a time until you get a pancake batter consistency. Coat the back of a wooden spoon with the batter, and run your finger through the batter. If it leaves a clear line, then you're good. If the line doesn't form, the batter may be too runny and you have put too much milk.
- Try to find a high-fat content coconut milk if you are substituting it for coconut cream.
- Some coconut creams are thicker than others depending on what brand you buy. If your batter comes out too thick from the thicker coconut cream, you can add 1-2 tablespoons of milk to thin it down a bit.
- After it has been baked, make sure you let the butter mochi fully cool before eating. Letting it cool, lets the crusty outer layer get crispier and it firms up the inside so that it becomes chewier.
- If you don't have a nonstick muffin pan, grease the pan very well with butter before pouring the batter into each muffin cup. I like to grease each muffin cup with butter and coat it with coarse semolina or cornmeal before pouring the batter into each cup. Just remember to shake out the excess semolina/cornmeal into the sink so that you don't have a thick layer. The semolina/cornmeal gives each mini cake an even crispier bottom and it lets each cake easily pop out of the pan.
Storage
These keep very well in a well-sealed container but make sure you keep it in the fridge since there is milk in it. They will keep for about a week. To crisp them up again, pop them in the oven at 350F (177C) for about 15 minutes and then let it cool so that it can get crispy again. I personally think they taste even better the next day.Butter Mochi Variations
- Salted Egg - We tried adding about 8 salted duck eggs yolks (they were about 1 inch in size) and they turned out fantastic. You will need to add 1 extra tablespoon of sugar to counterbalance the saltiness and make sure you mash them very well with a fork before you mix it in.
- Pandan - Start by adding ½ tablespoon of pandan extract. There are a lot of different kinds of pandan extract and some are stronger than others. I have used some that were pre-sweetened and some that were very strong and floral. You can add ½ tablespoon more if your first batch wasn't strong enough.
- Ube - Add in 1 tablespoon or ube extract and mix well.
- Matcha - Mix in 1 tablespoons of high-quality matcha into the dry mix before mixing it into the wet ingredients so that it will mix evenly.
- Peanut Butter - Mix in ¼ to ½ cup of smooth peanut butter while you are mixing the butter into the coconut cream.
Ingredients
Wet Ingredients
- 1 stick unsalted butter (melted, approximately ½ cup)
- 1 ½ cups coconut cream
- 1 can sweetened condensed milk (300ml, approximately 1 ¼ cup)
- 2 tablespoons vanilla extract
- 3 eggs (room temperature)
- 1 cup milk
Dry Ingredients
- 1 lb Koda Farms mochiko flour (glutinous rice flour) See Notes for Substitutions
- 3 tablespoons sugar
- 1 tablespoon baking powder
Instructions
Making the Butter Mochi Cake Batter
- Melt 1 stick unsalted butter in a microwave in 15-second increments until it has fully melted.
- In a large mixing bowl, add the melted butter, with 1 ½ cups coconut cream, 1 can sweetened condensed milk, and 2 tablespoons vanilla extract and mix it together.
- Add in 3 eggs 1 at a time while whisking.
- Add in 1 tablespoon baking powder, 3 tablespoons sugar and 1 lb Koda Farms mochiko flour and continue to mix
- Slowly add in 1 cup milk and mix until the batter is smooth. You want to achieve a pancake batter consistency. Run your finger through the batter on a back of a spoon and if it keeps it's shape and it's not too runny or thick then you're good.
- [Optional] Let the batter rest for 15 to 20 minutes so that the batter to come to room temperature, this gives the cake a chewier and crispier texture.
Baking the Butter Mochi
- Set the oven to 350F (176C)
- Butter the muffin tin liberally. (Optional) Lightly dust the buttered pan with cornmeal, coarse semolina, or flour and shake out any excess over the sink. This will help the cakes to easily pop out of the tray without sticking and if you are using cornmeal or semolina, it will also make the bottoms crispier.
- Fill each cup with ¼ cup of batter per cake and tap the tray gently on the counter to remove any air bubbles.
- Bake for 45 minutes to 1 hour (until golden brown) on the middle rack in the oven. At the 45 minute mark, check to see if they are golden brown. *If your oven runs hotter, then check at the 30 minute mark to see how golden brown it is.**If you are not sure if it is underdone, use a toothpick and insert it into the middle of a few mochis. It will come out cleanly without any batter if the middles are fully cooked.
- Let them cool for 5-10 minutes to form it's crispiness and enjoy!
Nutrition
*Nutritional information is calculated using online tools and is an estimate*
Disclaimer: We are a participant in the Amazon Services LLC Associates Program, an affiliate advertising program designed to provide a means for us to earn fees by linking to Amazon.com and affiliated sites, however I provide these links to make items easier to find if you cannot purchase this locally and I would never recommend anything I don’t own myself or highly recommend. I would prefer you buy your items locally if possible to support your local shops (and chances are they are cheaper locally as well!)
Mary Anne Balleza says
Hi Joyce!
Have you tried a matcha or ube version of this butter mochi? If so, could you please share the recipe?
Thank you and Happy Holidays!
Joyce Lee says
Hi Mary Anne!
I have not tried adding matcha and ube yet. I am having a hard time finding an ube extract here and the ones online (the ones that ship to Canada) look questionable. haha
I know this recipe is very versatile, so you definitely can mix matcha or ube in and I'm sure it will turn out good. You might need to pre-mix the matcha with the mochiko first until it is evenly distributed so that it doesn't clump before adding it into the wet ingredients. Matcha is notorious for clumping if it is added alone into wet ingredients.
As for ube, I assume it would come as an extract or liquid. Start with 2 teaspoons of extract and mix it in with the coconut cream. If it's a powder, then I'd say do the same as the matcha and mix it in with the mochiko first.
Keep in mind, I haven't made to with ube or matcha so the amount is just a guestimation. I tend to use less at first - worst-case scenario is the flavor is bland but you still have a good chewy butter mochi! Then if I like it stronger, then I'd add more next time.
If I ever do make it with ube or matcha, I will update the recipe and share it with ya! 🙂
Hope that helps! and Happy Holidays to you too! 💖
Michelle C says
I followed the recipe but used Thai Glutinous Rice Flour as I'm not able to obtain Mochiko Rice Flour. My muffins came out sunken. How do I prevent this from happening? Muffins still taste good though.
Joyce Lee says
Hi Michelle,
Hmmm... some of the mochis may come out slightly sunken but if they are very sunken, my guess would be that the baking powder is not strong enough - is it by any chance expired?
You can also put more batter in the muffin tins as well, and they should come out less sunken. Mine don't usually come out puffed up like a mushroom-shaped like a traditional muffin since glutenous rice flour is a lot denser than standard all-purpose flour. Next time, maybe trying putting a bit more batter per muffin tin and see if it comes out less sunken. Sorry I couldn't be more help...
Josue says
When I saw this butter Mochi Cake/ Muffin bakery photo, I showed to my kids whether they like this . Hshs😁 , both kids responded immediately to say yes " make these donuts for them" . So, I promised to bake for them would exactly use the same way as you taught,. I will advise you how these turnout; so are my kids SMILE & salute to their favorite that they called mini donuts 🍯🍮.
Joyce Lee says
Hi Josie,
Funny how they call it mini donuts. I love that they are bite-sized too.
Su says
Do you think a mini muffin tin would work, giving almost bite sized crispy edged chewiness or would there be too much crust for the amount of chew left? Also, do you think adding small pieces of candied ginger would work or not?
Thanks.
Joyce Lee says
Hi Su!
I think you're right, depending on how small the mini muffin tin is, you might lose a bit of the chewiness in the middle since there will be more crust than the center, and adding a small piece of candied ginger will probably take away from the center chewiness as well.
If you use a regular muffin tin, you can probably put the candied ginger in the middle without taking too much of the chewiness out but you may have to adjust the cooking time (I'm not 100% sure since I haven't tested putting things in the middle of mochi). When I use a regular-sized muffin pan, the mochi doesn't turn out very large since I only use about 1/4 cup of batter in each muffin cup so the mochi cake doesn't turn out too large and ends up being the size of a two-bite brownie. 😊
Hope this helps and hope you enjoy it!
Alex says
Do you have freezer instructions? I wonder if I can bake them and then freeze or if I should try freezing the batter to bake later. This looks so yummy!
Joyce Lee says
Hi Alex!
Interesting! I have never tried freezing them after baking them. It'd be interesting to see if the chewy texture will still be the same after freezing them! Let me know if you test it out by freezing them! I'm interested to see how it turns out!
As for freezing the batter, I have never tried that as well, but I don't think it would work because freezing it would solidify the coconut cream and butter into solid bits and when you defrost it to bake, you'd most likely have solid chunks of uneven butter/coconut fats in the batter which would make for uneven baking
Candice says
Great recipe! Couldn’t stop eating them!
Joyce Lee says
Hi Candice!
Yay! So happy you like these! I find these super additive too! My husband and I are actually on our 3rd batch this month. haha A bit overkill right? haha! 🙂
Lil kotonk says
Hi! I noticed in your pictures your cupcake tin has 6 cups, mine is standard 12 cups for the tin. Will this make a difference in amount put in each cup and baking time?
I’d I’m using coconut milk instead of cream, will I have to decrease liquid someplace else since it’s thinner than the cream?
I’m looking forward to making this soon. My friends and family all love the crispy edges of butter mochi. We all “fight” for them. LOL
Joyce Lee says
Hi Lil Kotonk!
No it shouldn't make a difference if you use the 12 cup one. I actually don't like my 6 cups muffin tray. I have to make 6 batches to finish baking this recipe and it's a bit of a pain and very time consuming haha! I'm looking for a new muffin tray, hopefully, a 12 cup one! heehee!
I have actually used coconut milk before for this recipe, and it turned out fine. The mochi actually tastes better the next day when it has time to firm up a bit. I like to stick it in the oven for 10 mins to reheat it and make it crispy again and I swear it tastes better the next day. My favourite part is definitely the edges too, that's why I decided to use a muffin pan for this - every piece is an edge!! haha!