
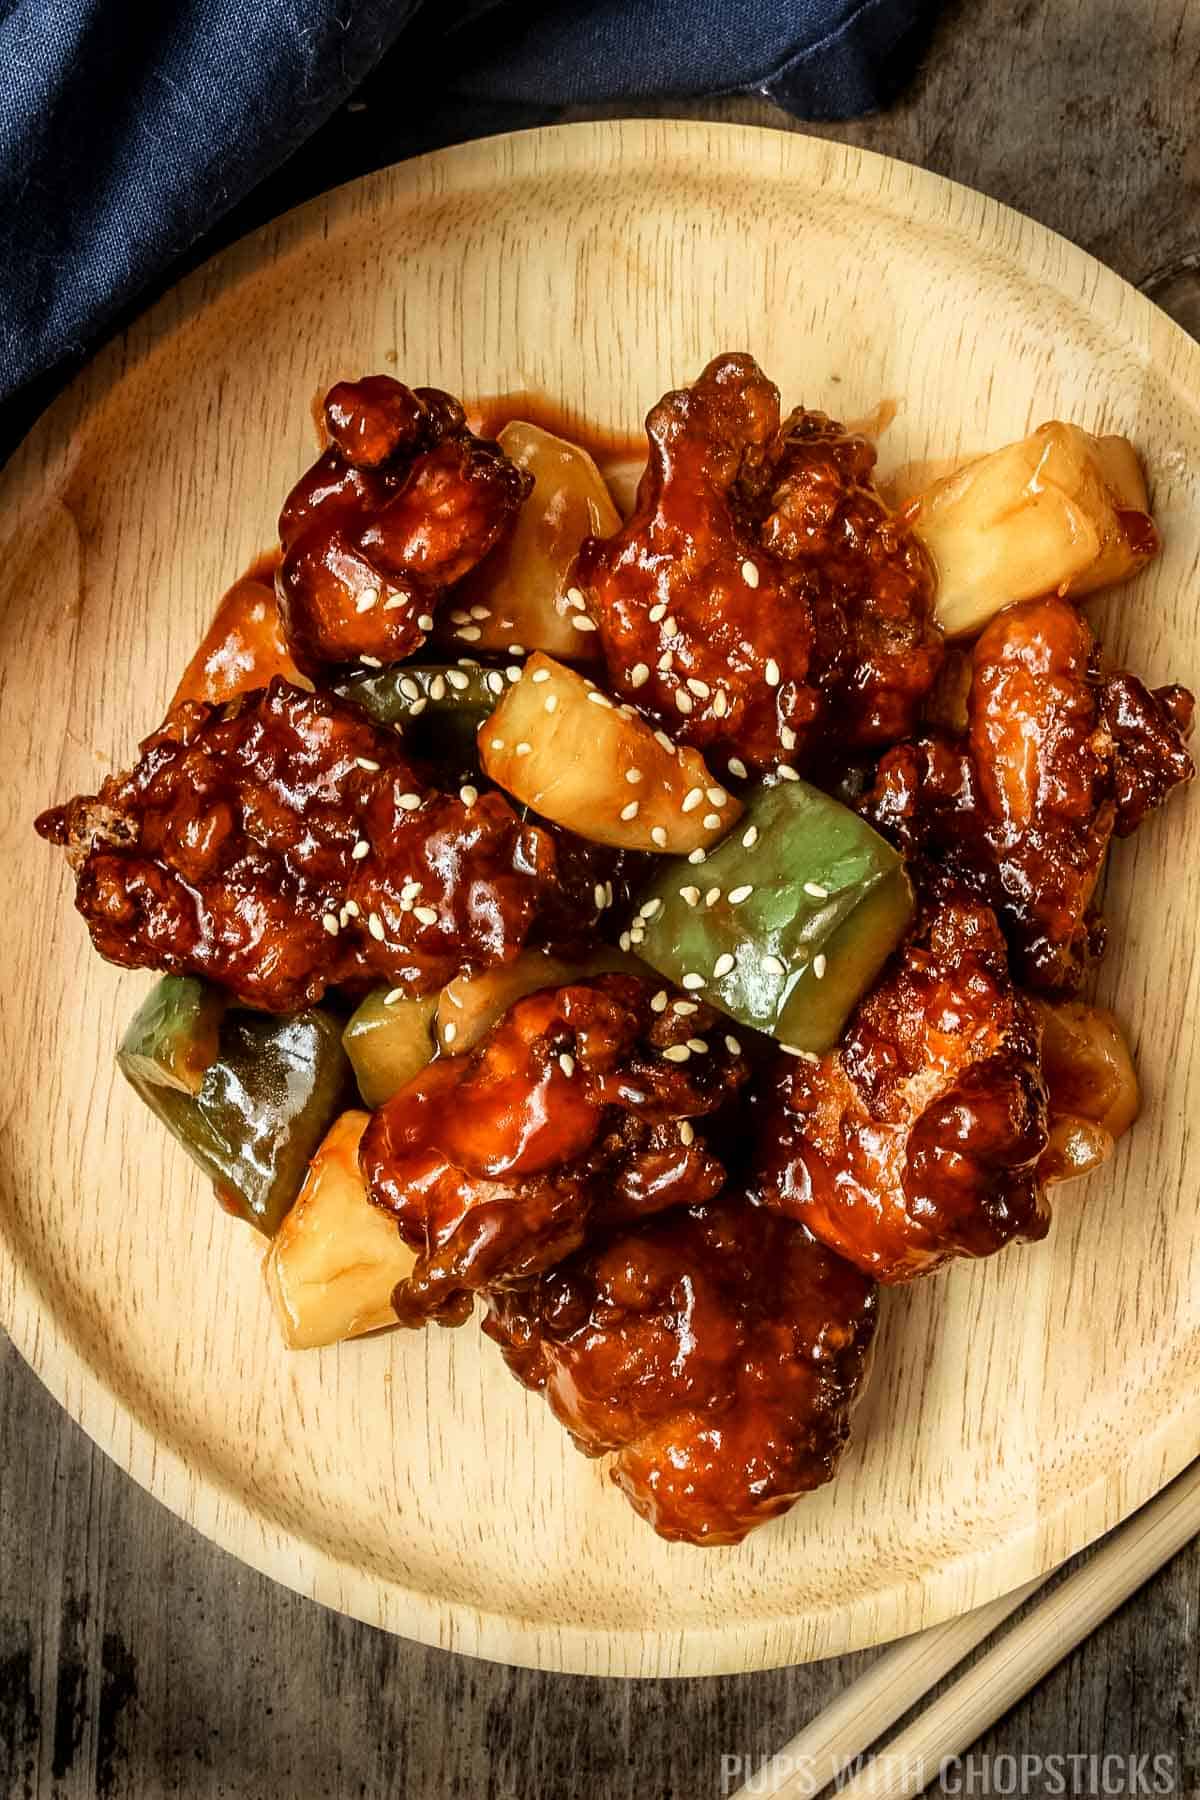
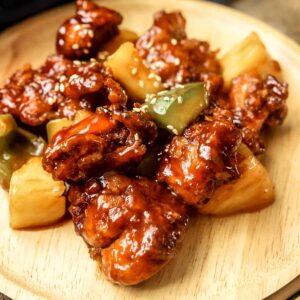
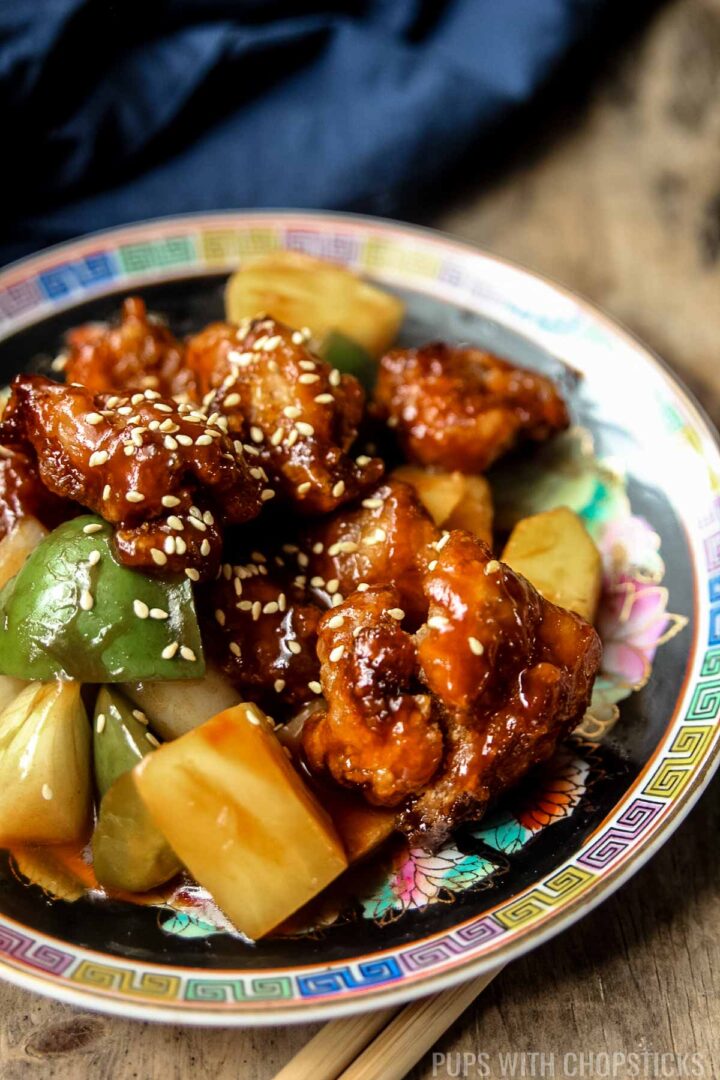
This classic Chinese sweet and sour chicken (Hong Kong Style) is made with pineapple, peppers, onions, and crispy chicken, tossed in a sweet and sour sauce with the perfect balance of tanginess to sweetness. It's perfectly crispy and delicious!
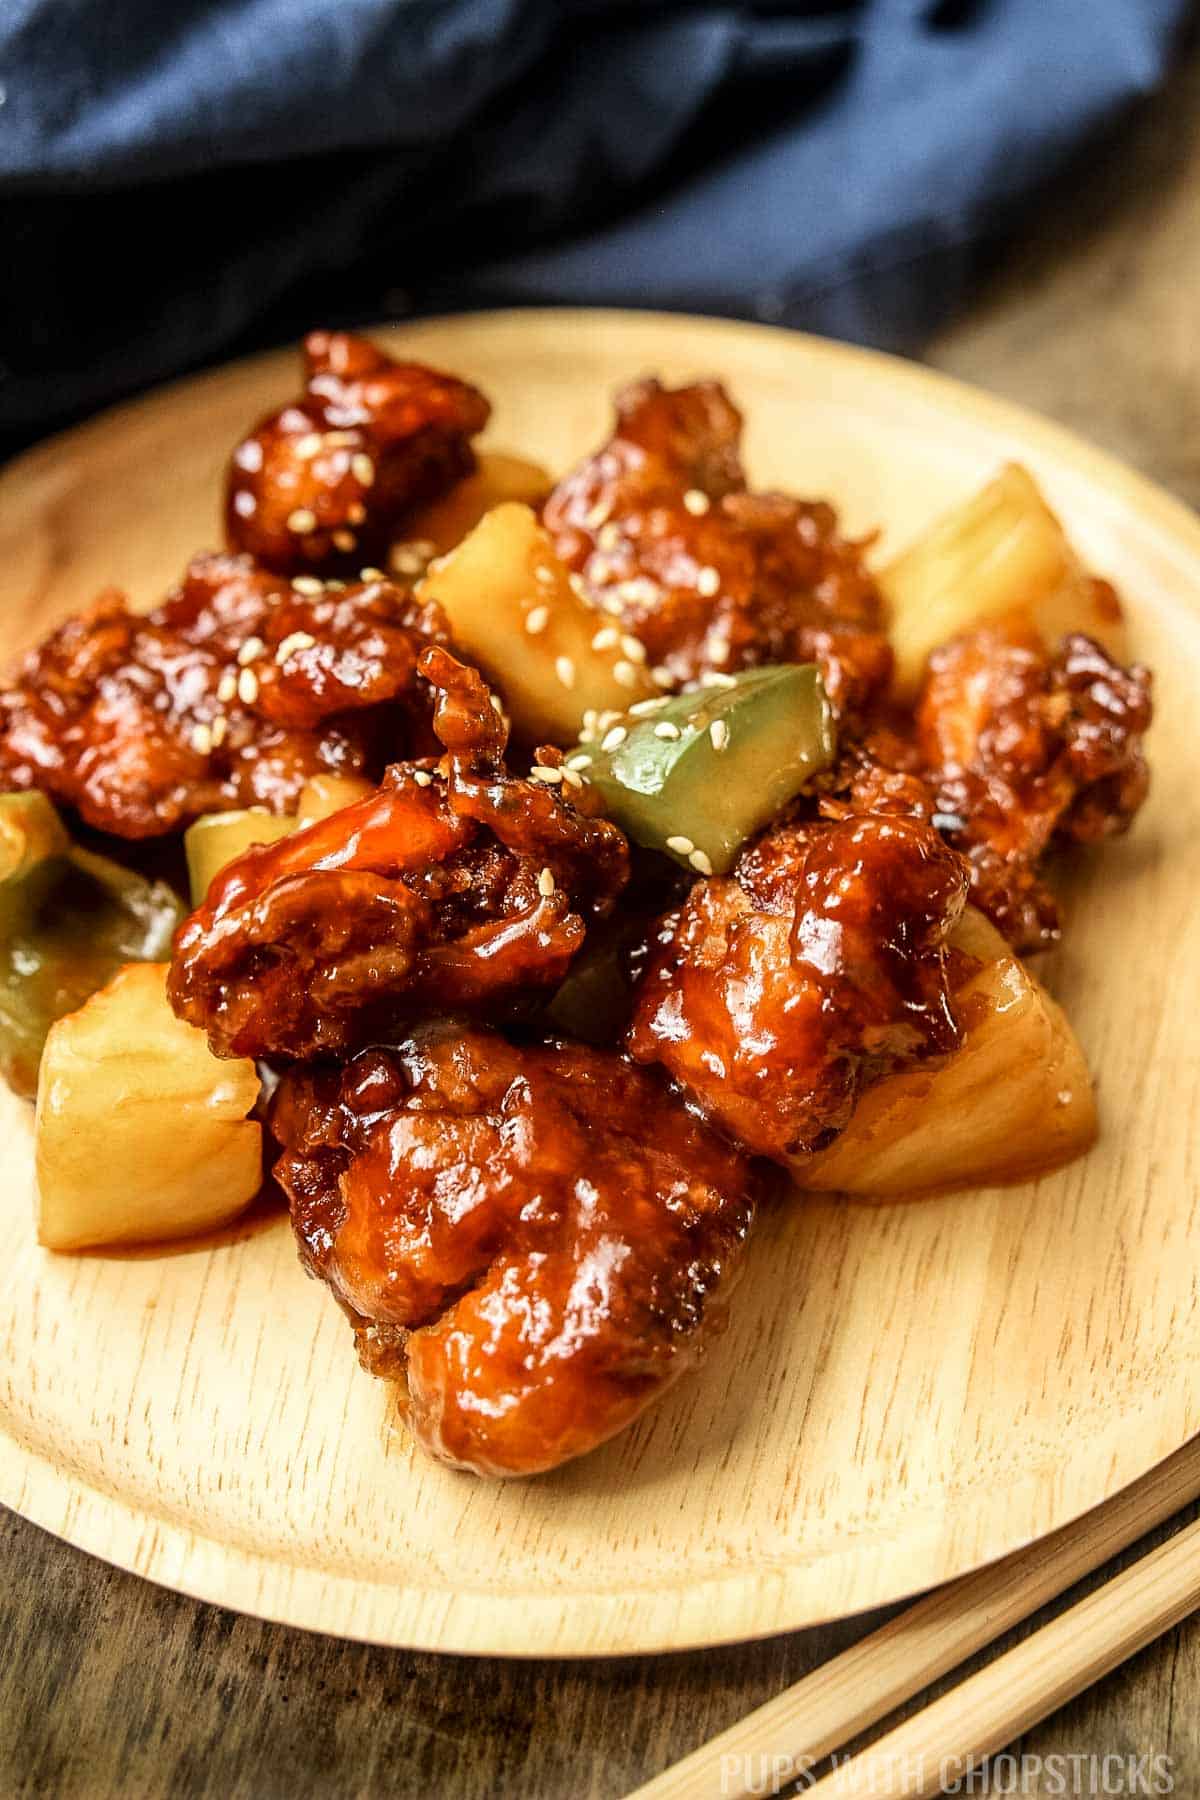
Table of Contents
- What is Hong Kong Style Sweet and Sour Chicken?
- Why You’ll Love This Cantonese Style Sweet and Sour Chicken Recipe
- Ingredients You’ll Need to Make Sweet and Sour Chicken
- Sweet and Sour Sauce Ingredients
- How to Make Sweet and Sour Chicken (Step by Step)
- Joyce's Tips for Making the Best Crispy Cantonese Sweet and Sour Chicken
- FAQs
- How to Store Leftover Sweet and Sour Chicken
- More Chinese Recipes You May Like
- Did You Make This Recipe?
- Recipe Card
Deep-fried foods are definitely my favorite thing in the world to eat. There's something very satisfying about crispy battered meat tossed in a sweet and sticky sauce. And this recipe is no exception - it has the most beautiful combination of flavors and everyone who tries it, asks for seconds!
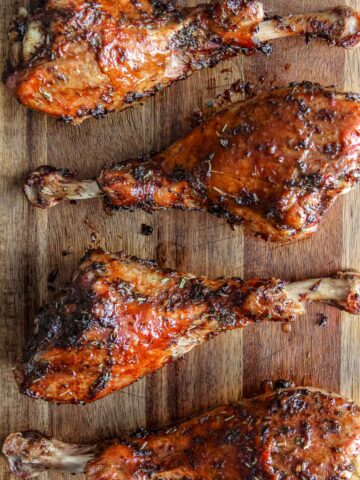
I definitely do not have a shortage of crispy takeout recipes either, so if you're looking for something different like Hakka Chilli Chicken, Chicken Manchurian, Korean Popcorn Turkey, Chinese Lemon Chicken or the popular Crispy Beef, I got you covered!
If you're looking for something similar to this recipe but made with pork instead, I also got you covered with my Cantonese Style Sweet and Sour Pork recipe, but if you're just interested in the sauce, I use my tried and true Chinese Sweet and Sour sauce for these recipes which is made from scratch and doesn't contain any ketchup.
If you're looking for a crispy, easy Chinese sweet and sour chicken recipe with the perfect balance of sweet to sour, without the soggy batter, then you're at the right place! Let's get started.
What is Hong Kong Style Sweet and Sour Chicken?
The main difference between Hong Kong style sweet and sour chicken (aka Cantonese sweet and sour chicken) and the ones you get at most American Chinese takeout restaurants is the sauce.
Hong Kong Style sweet and sour chicken sauce is usually less sweet and has more of a balance of sweet and sour flavors, whereas the American Chinese version is a touch on the sweeter side.
If you prefer your sweet and sour chicken more on the sweeter side, you can add 1-2 additional tablespoons of sugar to the sauce during the cooking process. Other than that, there isn't much of a difference between the two - both are delicious!
If you're wondering what is the major difference between my Hong Kong style sweet and sour chicken and my sweet and sour pork, the main difference is the batter. I made the batter for the chicken version a bit lighter with fewer aromatics so that you can actually taste the chicken better so it feels a bit lighter as well.

Why You’ll Love This Cantonese Style Sweet and Sour Chicken Recipe
- Takeout At Home: The combination of crispy chicken, vibrant vegetables, and the perfect balance of sweet and sour sauce makes this dish a hit with the whole family. It’s a meal that will have everyone asking for seconds, and it's a fun way to do takeout at home.
- Delicious Sweet and Sour Sauce With A Perfectly Balanced Sweet and Sour Tang: Since this is a Hong Kong style sweet and sour chicken, the sweet and sour sauce is less sweet than your average sweet and sour sauce you find at restaurants.
- Crispy Flavorful Crispy Batter: The batter includes the marinade and some starch which makes an incredibly flavorful crispy and crunchy batter.
Ingredients You’ll Need to Make Sweet and Sour Chicken
All you need are some incredibly simple, pantry-staple ingredients to make this delicious sweet and sour chicken recipe at home.
Here's an overview of the specific ingredients for this recipe. For the exact ingredients and measurements, please scroll to the recipe card below.
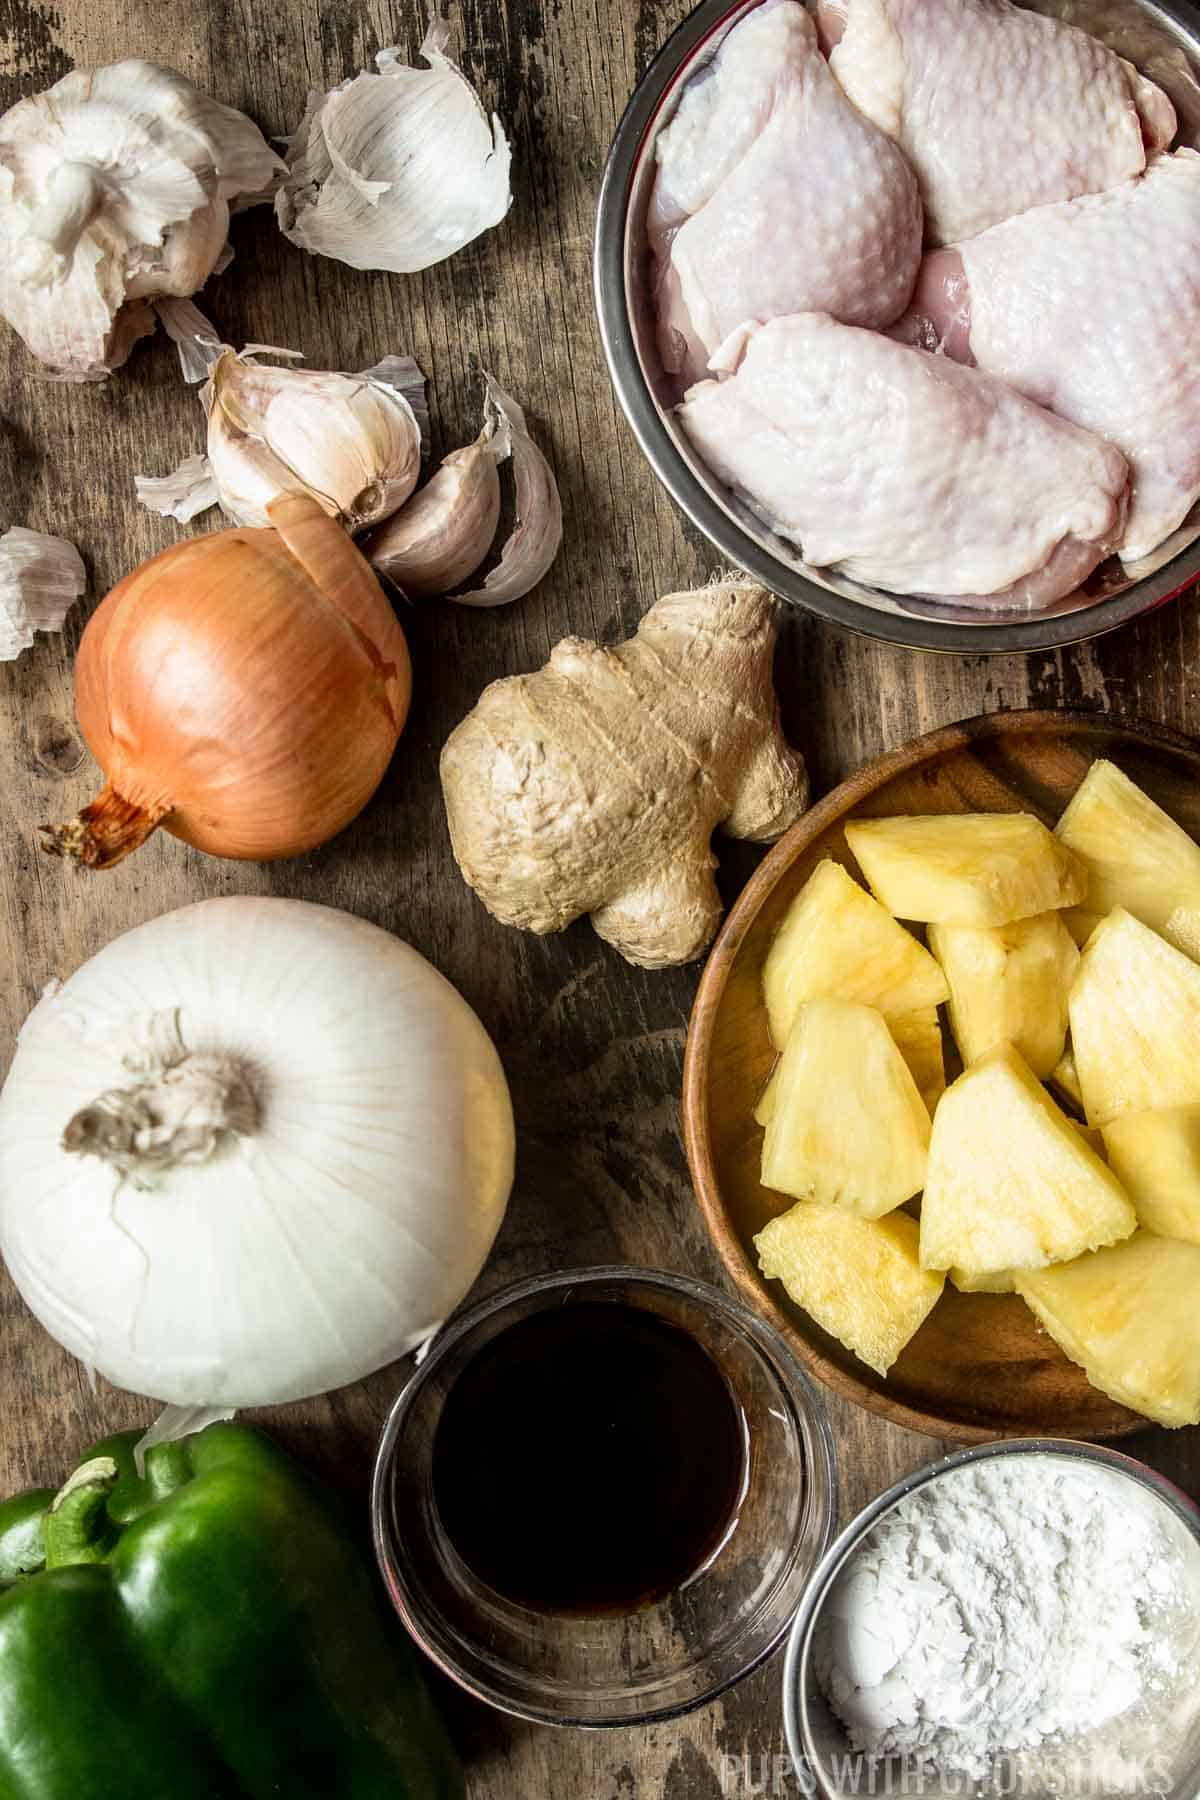
- Chicken: This is definitely the star of our dish! For this sweet and sour chicken recipe, I like to use dark meat. That being said, chicken breast also works really well for this recipe because it's only deep fried for about 3 minutes; there will be no risk of it becoming dry.
- Onion, Garlic, and Ginger: I use these three trio aromatics to give the batter extra flavor. Highly recommend you don't skip them.
- Starch: Using any type of starch is what will make the batter extra crispy. Although potato starch does make the batter crunchier, which means the sauce won't make the chicken soggy, I highly recommend using corn starch instead because it's easier to find and work with. If you plan to use potato starch, you must deep fry in small batches and make sure the chicken does not touch each other during the initial deep frying stage (first minute or so), or else they will stick to each other and become a big ball of meat, and when you try to separate it at that point, you will rip off the batter.
- Bell Pepper: You can use any type of sweet peppers for this recipe (Green, yellow, red, orange, etc), but I find the green ones give a nice contrast in color and has a bit more flavor.
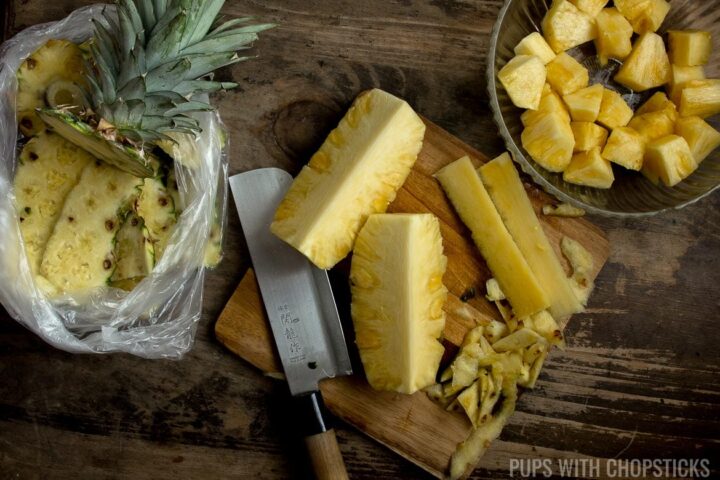
- Pineapple: This is where the sweetness in the dish primarily comes from. I like to use fresh pineapple for this recipe because I find it's a lot juicier and flavorful, but it is a lot of work to cut it for just one dish. If you're pressed for time, canned pineapple will also work as well. Just make sure you drain the juice and buy the rings so you can control how large the chunks are. Alternatively, you can also use pineapple chunks as well just make sure to defrost them before you use them.
- Shaoxing Cooking Wine: I add a bit of Shaoxing cooking wine for flavor, but if you don't have this, you can substitute it with dry sherry or omit it.
Sweet and Sour Sauce Ingredients
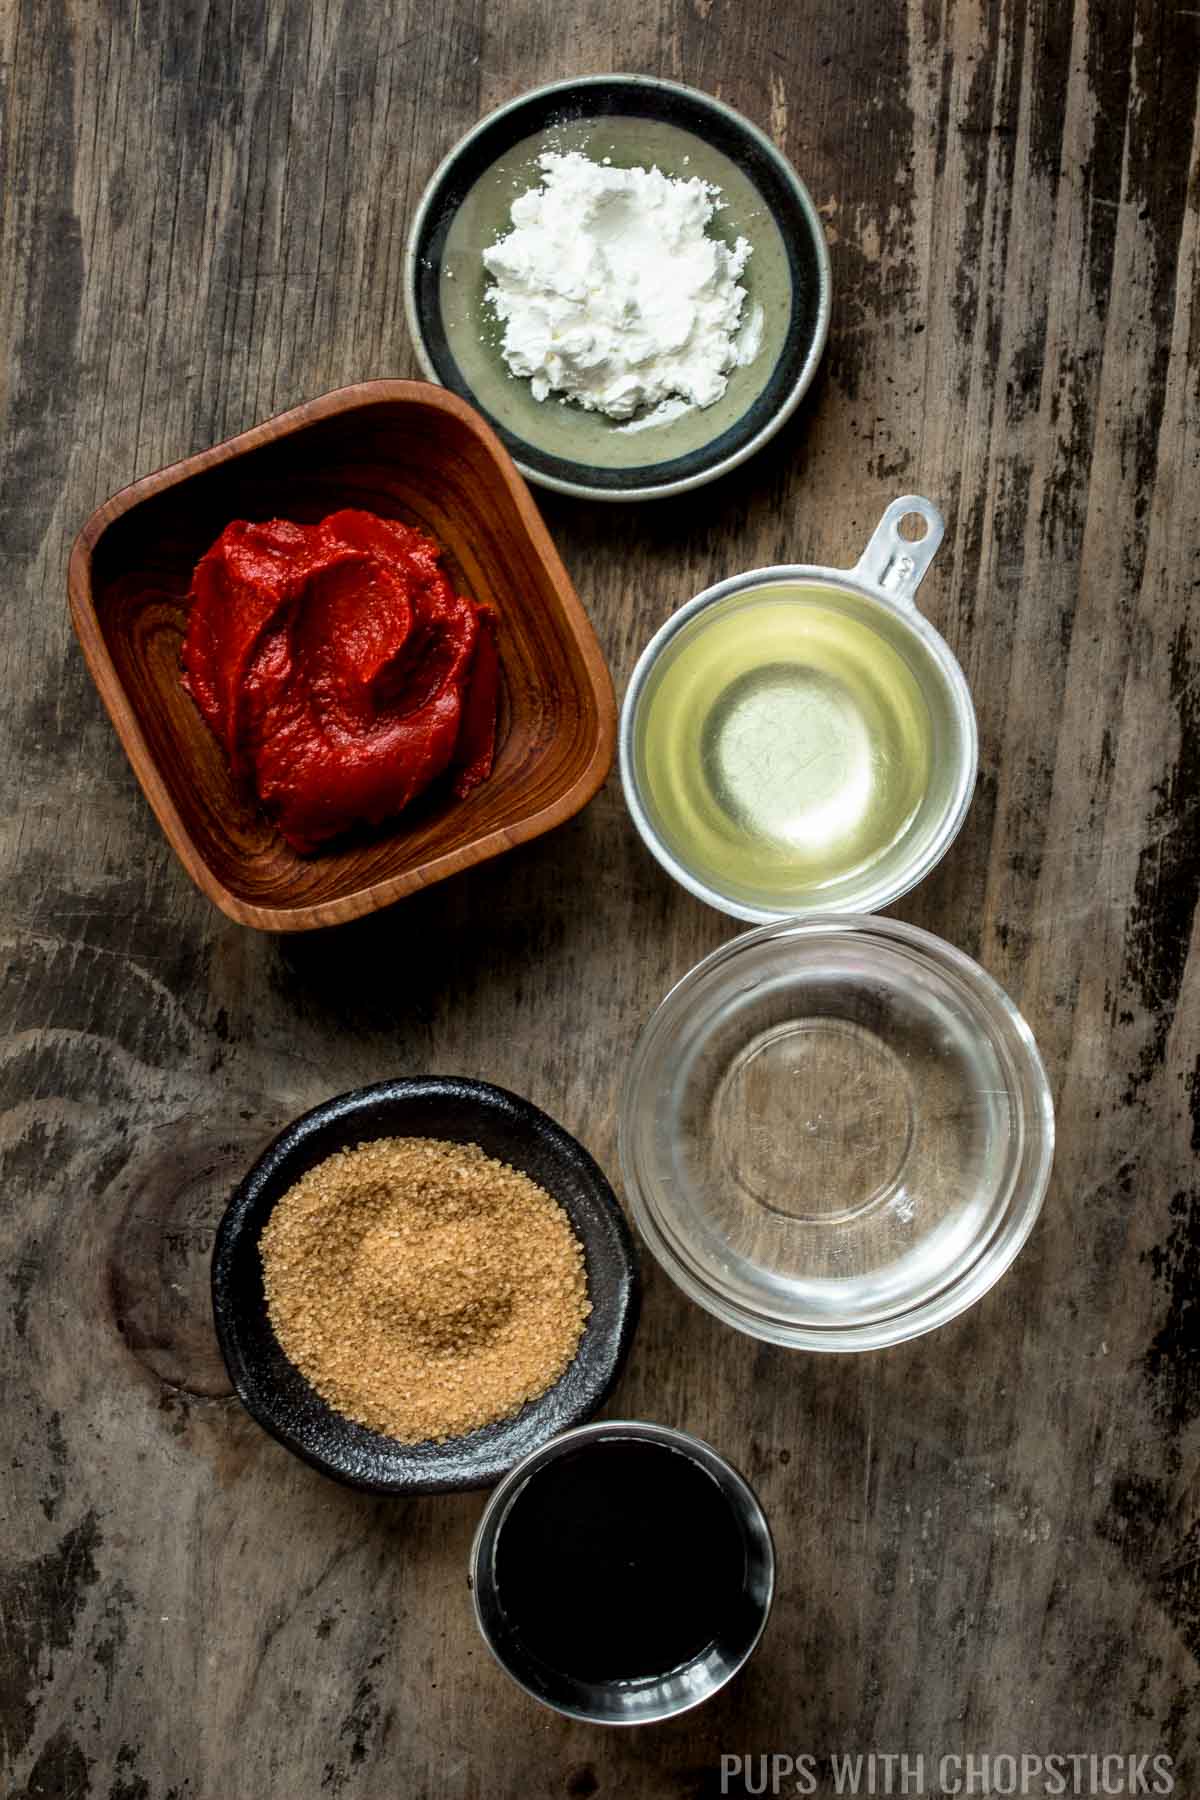
- Tomato Paste: This is used in the sweet and sour sauce to give it a rich, tomatoey flavor. I don't use any ketchup for my sweet and sour sauce because I find tomato paste gives a lot more flavor and it also has an umami flavor to it as well.
- Sugar and White Vinegar: Sugar and vinegar is a must for this sauce. I tested this very thoroughly and made sure that this is a good sweet-to-sour balance (I tend to enjoy sweet and sour sauce that is less sweet and has a nice tart kick to it.) I like to use white vinegar because it is a neutral vinegar and easy to find and I find it tastes better than using rice vinegar.
- Soy Sauce: I highly recommend not omitting soy sauce. It gives the sauce extra umami flavor but it also balances out the sweet and sour flavor and brings the whole sauce together. I like to use light or low sodium soy sauce.
- Oil: The oil is used to 'toast' the tomato paste. Toasting it in the oil will concentrate the flavor of tomato paste and really bring out the flavor. It also removes any trace of tomato flavor.
- Corn Starch and Water: I use corn starch slurry to thicken the sauce at the very end.
How to Make Sweet and Sour Chicken (Step by Step)
Making this incredible Hong Kong style sweet and sour chicken recipe at home is super easy and will give you great results every single time. Here's how to make it step by step:
1.) Always Use A Starch to Batter
When it comes to any type of crispy better foods like Crispy Beef, Sweet and Sour Pork etc, it's important to always use starch in your batter. If you're looking for a more delicate and crispy batter (like the one I use in My Ultimate Super Crispy Fried Chicken recipe) then you would mix all-purpose flour in it but for anything that needs to be coated in a sauce (like this recipe), I only use starch in the batter. Starch creates a harder and crunchier batter that can withstand the coating of sauce better which prevents it from being soggy.
The 2 main starches that I use interchangeably are corn starch and potato starch. I listed the pros and cons below so that you can decide what type of starch works for you.
- Corn Starch - There are no cons to using corn starch. It's easier to find and easier to work with, which makes it the perfect starch to use for deep frying.
- Potato Starch - The pros of using potato starch is it creates a VERY crunchy batter but it is harder to find than corn starch.
The major con about using potato starch is its ease of use. When you deep fry with potato starch, you need to be extra careful when you are initially putting the chicken into the hot oil.
Once the potato starch touches the hot oil, it will initially become gummy and sticky, so if you have 2 pieces too close together they will stick together. Once the chicken sticks together it is very hard to pull apart without ripping the batter off the meat. If you put all the chicken in all at once it can potentially become one giant ball of meat as well.
If you plan to use potato starch, you need to deep fry the chicken in small batches, making sure the batter has fully hardened before you move them around.
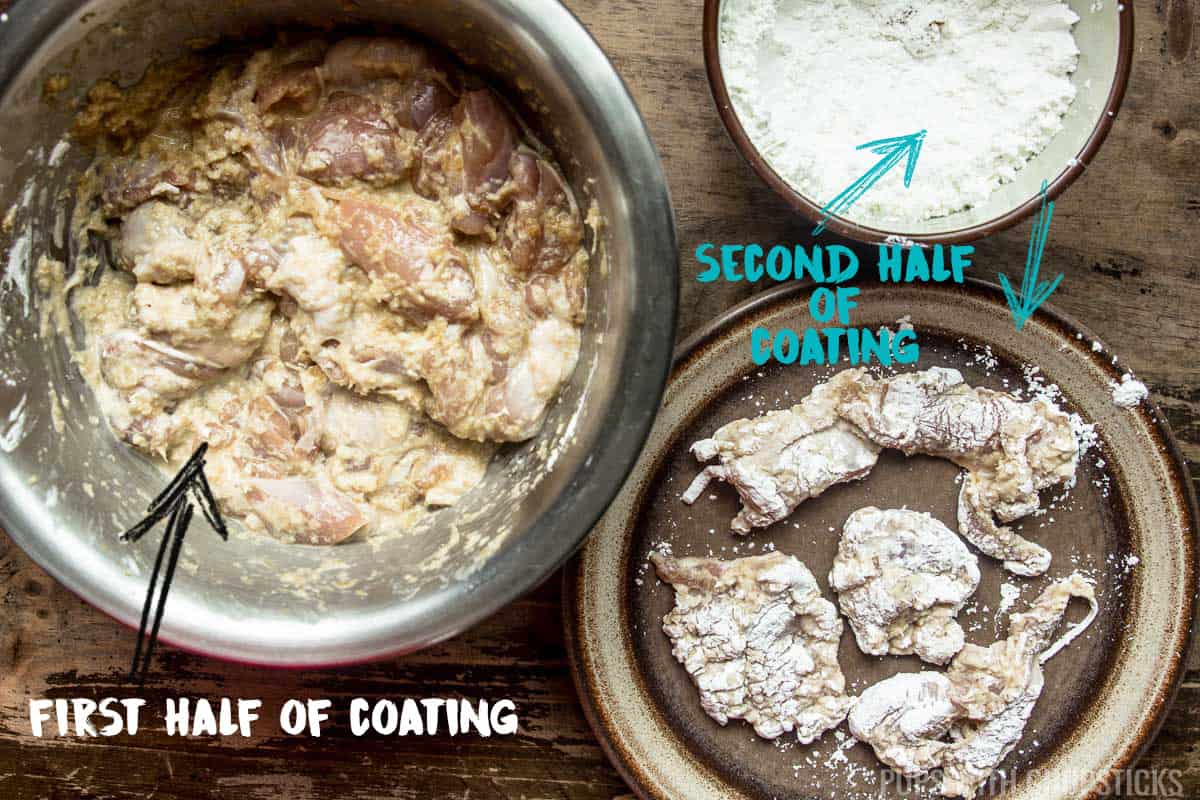
2.) Battering Process (2 Steps)
Step 1 - First Coat (Sticky Batter)
Coat the marinated chicken in ½ the starch and let it sit for a few minutes until the starch absorbs the marinade. This will make the batter more flavorful. The starch will start to become thick and gummy.
Step 2 - Second Coat (Sealing the Flavourful Batter)
Put the other ½ of the starch on a plate. Once the first coat of starch has absorbed all the marinade, dunk each piece of chicken in the starch on the plate to create a white starch coating. This coating makes the chicken crispier.
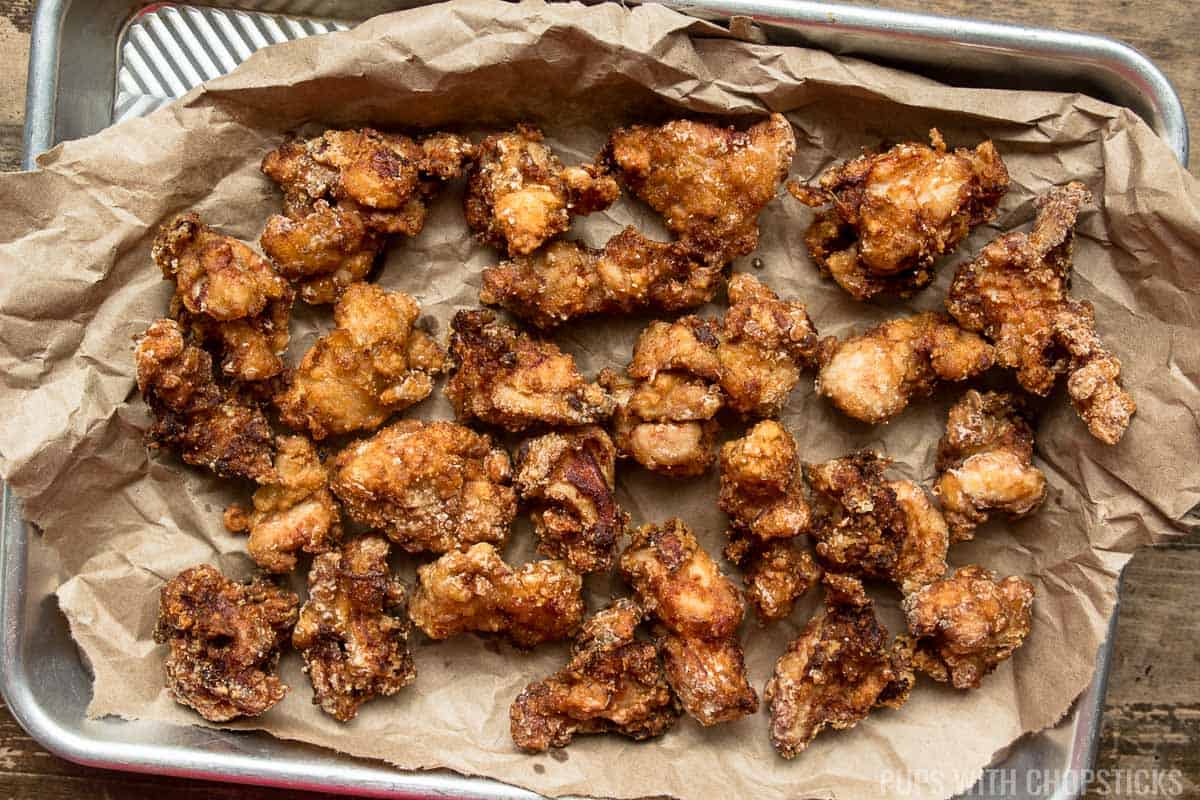
3.) Double Fry
Double frying is a Korean cooking technique that is used to get anything super crunchy. It's an easy step and definitely shouldn't be skipped if you want to get your chicken batter to have a super crunchy hard shell.
To double fry, you need to first deep fry your chicken until it is fully cooked (which is about 3 minutes). Once the chicken is fully cooked, remove the chicken from the oil and let it sit out for about 30 seconds. After 30 seconds, dunk the chicken back in the oil to fry again for another 30 seconds or until golden brown.
Joyce's Tips for Making the Best Crispy Cantonese Sweet and Sour Chicken
- Use Fresh Pineapple if Possible: While canned pineapple can work in a pinch, fresh pineapple chunks can elevate your sour chicken recipe with their natural sweetness and distinctive flavor.
- Marinate for Deep Flavor: Allow your chicken pieces to marinate for at least an hour. The garlic, ginger, soy sauce, and Shaoxing wine infuse the chicken with rich, aromatic flavors that truly make this dish stand out.
- Double Fry for Crispy Chicken: After the first fry, let the chicken rest for a minute, then re-fry it. This method guarantees a crispy, golden chicken that holds up well in the sweet and sour sauce.
- Quickly Coat the Chicken: To keep the chicken crispy, add it to the sauce at the very end of cooking. Toss it for about half a minute to one minute, just enough to coat each piece, then turn off the heat.
- Balance Your Sweet and Sour Sauce: The perfect sweet and sour sauce strikes a balance between sweetness and tanginess. Adjust the sugar and vinegar to your personal tastes for a sauce that compliments your chicken perfectly.
- Thicken Your Sauce Correctly: To avoid lumps, dissolve the cornstarch in cold water before pouring it into the sauce. Stir constantly as you pour to guarantee a smooth, thick sauce that clings to every bite of chicken.
FAQs
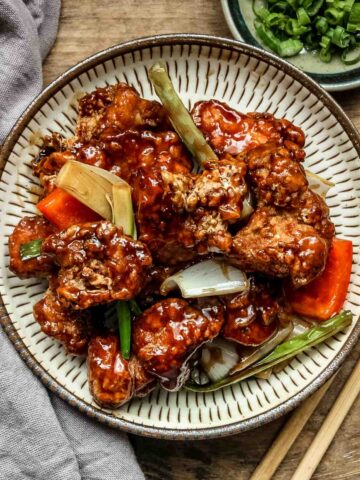
While both dishes involve deliciously fried chicken pieces, the difference lies in the sauce. Sweet and Sour Chicken uses a sauce that is both sweet and tangy, giving a balanced flavor profile. On the other hand, General Tso's Chicken is known for its sweet and spicy sauce, which lacks the tangy flavor found in Sweet and Sour Chicken.
Yes, you can substitute Shaoxing wine with dry sherry in the marinade if it is not readily available. However, if both are unavailable, you can simply omit it from the recipe. It is there to add a depth of flavor, but your Sweet and Sour Chicken will still be delicious without it.
To keep your chicken crispy, it's important to not let it cook too long in the sauce. The longer the chicken stays in the sauce, the soggier it will get. A quick toss in the sauce for about twenty to thirty seconds should be enough to coat the chicken without making it soggy.
Yes, you can use canned pineapple in this recipe. If using canned pineapple, remember to drain it well before adding to the dish. However, fresh pineapple is highly recommended for its natural sweetness and tanginess which enhances the overall flavor of the dish.
Absolutely! While bell peppers and onions are traditional to this dish, you can certainly add other vegetables. Feel free to get creative and add in vegetables like carrots, snow peas, or baby corn for added texture and flavor. Just remember to cut them into bite-sized pieces to guarantee even cooking.
How to Store Leftover Sweet and Sour Chicken
Once the dish has cooled down, transfer the sweet and sour chicken into an air tight container, it should keep well for up to three to four days.
Unfortunately, due to the crispy nature of the chicken in this dish, freezing is not recommended. Freezing and thawing can make the chicken soggy, which takes away from the delicious crunch that contrasts so well with the sweet and sour sauce.
More Chinese Recipes You May Like
Did You Make This Recipe?
If you made this sweet and sour chicken recipe, I want to see! Follow Pups with Chopsticks on Instagram, snap a photo, and tag and hashtag it with @pupswithchopsticks and #pupswithchopsticks. I love to know what you are making!
Please also consider leaving a ⭐⭐⭐⭐⭐ rating and a comment to tell me how it went! I'd love to hear from you if you made this!
If you like my recipes and want to be updated on when new ones come out, please consider subscribing to my newsletter (we don't spam) and follow along on Instagram, Facebook, and Pinterest for all of my latest recipes!
Recipe Card
Sweet and Sour Chicken
Joyce's Recipe Notes
- To keep the chicken crispy and prevent it from getting soggy, make sure you don't cook the deep-fried chicken in the sauce for too long. The longer you cook it in the sauce, the soggier it will be. I like to add the chicken at the very end, toss it for about 20-30 seconds and then turn off the heat.
- If you don't have Shaoxing wine for the marinade, you can substitute it with dry sherry or omit it.
- Alternatively, you can use potato starch instead of cornstarch as the batter, which will give you a harder and crunchier batter. If you use potato starch, it's incredibly important to fry the chicken in smaller batches and make sure each piece of chicken is not touching when you initially put it in the pan, or it will all clump together. Once the chicken pieces form a more solid, crispy shell, you can move them around in the oil.
Ingredients
Fruit and Vegetables
- ½ cup bell pepper (any color, cut into 1 inch cubes)
- ½ cup pineapple (highly recommend using fresh pineapple, but canned pineapple works too)
- ½ white onion (cut into 1 inch cubes)
Marinade
- 1 lb chicken (boneless, dark or white meat cut into 1 inch cubes)
- 2 cloves garlic (approx. ¾ tablespoon)
- 1 slice ginger (approx ½ tablespoon)
- ¼ onion (approx. 2 tablespoons)
- 2 tablespoons light soy sauce (or low sodium)
- ½ tablespoon Shaoxing Cooking Wine (if you don't have this, omit it)
Batter
- 1 cup corn starch (divided in half)
Sweet and Sour Sauce
- ¼ cup tomato paste
- 2 tablespoons oil
- ½ cup white vinegar
- ½ cup sugar
- ¼ cup water
- 2 tablespoons soy sauce
Corn Starch Slurry (To Thicken Sauce)
- 2 teaspoons cornstarch
- 2 teaspoons cold water
Instructions
Preparation
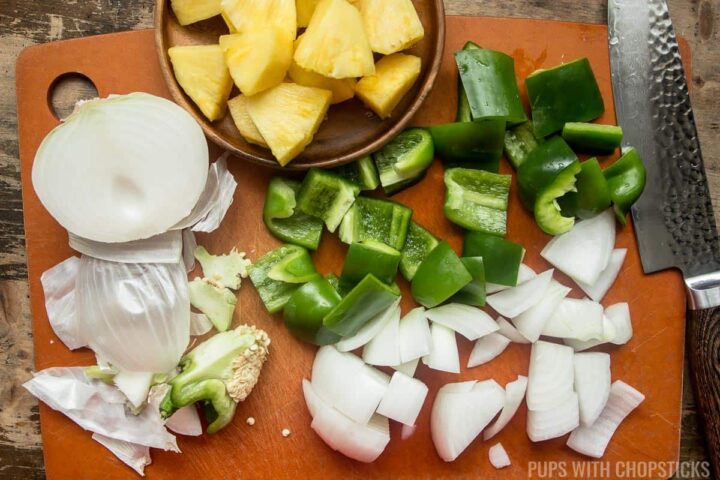
- Cut ½ white onion and ½ cup bell pepper into 1-inch chunks and set aside

- If you are using fresh pineapple, core and peel it and then cut them into 1-inch chunks and set aside. If you are using canned pineapple, drain it and cut them into 1-inch chunks if you are using pineapple rings. Put them in a bowl and set them aside.
Marinating the Chicken
- Cut the chicken into 1-inch chunks and place it in a bowl.
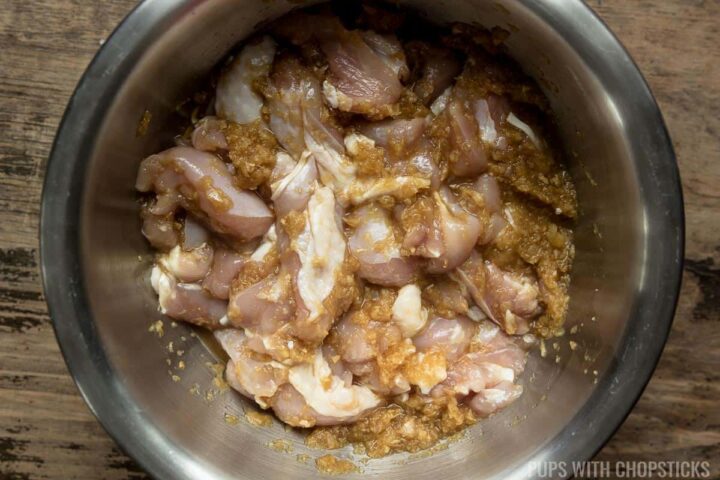
- Grate the 1 slice ginger, 2 cloves garlic, and ¼ onion and put it all in the bowl with the chicken.Alternatively, you can also chop the ginger, garlic, and onion into small pieces and blitz them in a food processor. You may also need to add the soy sauce and Shaoxing wine into the food processor with the ginger, garlic, and onions to help it blend more smoothly into a paste. Add the blended aromatics into the bowl with the chicken.
- Add 2 tablespoons light soy sauce and ½ tablespoon Shaoxing Cooking Wine to the bowl and mix everything very well.
- Let it marinate for 1 hour.
Battering the Chicken
- Once the chicken has finished marinating, in the bowl or plate - separate them slightly so they are not clumped together into a tall pile.
- Add half the cornstarch over the chicken and gently toss it until each piece has been coated with the cornstarch.Let it rest for 5 minutes until the cornstarch has absorbed the marinade and moisture, and the batter looks gummy and moist.
- Add the rest of the cornstarch to a large plate and dip each piece of chicken into it one by one until each piece is well coated.

Deep Frying the Chicken
- If you are using a deep fryer, set the temperature to 350F (180C) and wait for the oil to get to temp.If you are using a frying pan or shallow pot, set the heat to medium heat and make sure there is at least 1 inch of oil in the pan. To test if the oil is hot enough in a pot, use a wooden chopstick or the back of a wooden spoon and dunk it in the oil. If it starts to bubble, the oil is hot enough to start deep frying.
- Add the chicken in when the oil is hot, careful not to overcrowd the pan. (Depending on how big your pan is, you may need to do it in 2 batches). Cook the chicken for approximately 3 minutes until it is crispy and browned.
- Once the chicken has finished deep frying, remove it from the oil for about 1 minute, and then re-fry (double fry) it again for about 30 seconds to 1 minute.
- Remove the crispy fried chicken and let it drain on a rack or a plate with something absorbent like newspaper or paper bag and set aside.

Putting It Together
- In a clean frying pan, add 2 tablespoons oil, and set the stove to medium heat.
- Add in ¼ cup tomato paste when the oil is hot and toast the tomato paste for 1-2 minutes until the oil has turned orange
- Add in ½ cup white vinegar, ¼ cup water, ½ cup sugar, and 2 tablespoons soy sauce and mix well and let it cook for 5 minutes.
- In a small bowl, dissolve 2 teaspoons cornstarch in 2 teaspoons cold water. Slowly pour it into the sauce but make sure you are constantly stirring it so it doesn't clump.
- Once the sauce has thickened, add in the peppers, pineapples, and onions and cook it for 1 minute. Use your spatula to separate the onion chunks into smaller pieces.
- Add in the crispy chicken pieces and stir fry them to coat each piece of chicken with the sweet and sour sauce. Once all the chicken pieces have been coated, turn off the heat.Try not to cook the crispy chicken in the sauce for too long, this will make the batter soggy. You just want to quickly coat the crispy chicken with the sweet and sour sauce for no more than 30 seconds to 1 minute and then plate it.
- Plate it and serve with rice! Happy Eats! 🙂

Nutrition
*Nutritional information is calculated using online tools and is an estimate*
Disclaimer: We are a participant in the Amazon Services LLC Associates Program. As an Amazon Associate, I earn from qualifying purchases at no cost to you - these earnings help keep this blog running. While I appreciate the support – please try to buy your items locally if possible to support your local shops (chances are they are cheaper locally as well!)


Misty says
My whole family really loved this dish! It was a delicious balance of sweet and sour! Thank you for the great recipe!
Dylan says
This is my go-to Sweet and Sour recipe, I love cooking and I have tried many variations of sweet and sour and this is by far the best and easiest out there. Great flavors.
One or two tweaks, my wife can't eat gluten so I used Tamari Gluten Free soy sauce, I also used a small tin of pineapple chunks and used the juice in the tin instead of the water for the sauce for extra flavour. It was more or less exactly the 1/4 cup measurement.
Joyce Lee says
Hi Dylan!
I'm so happy you and your wife like this! 🙂
Thank you for sharing your tweaks! I always love to see and get ideas and inspired on everyone's changes! I'll have to try the pineapple juice sub next time! 🙂