
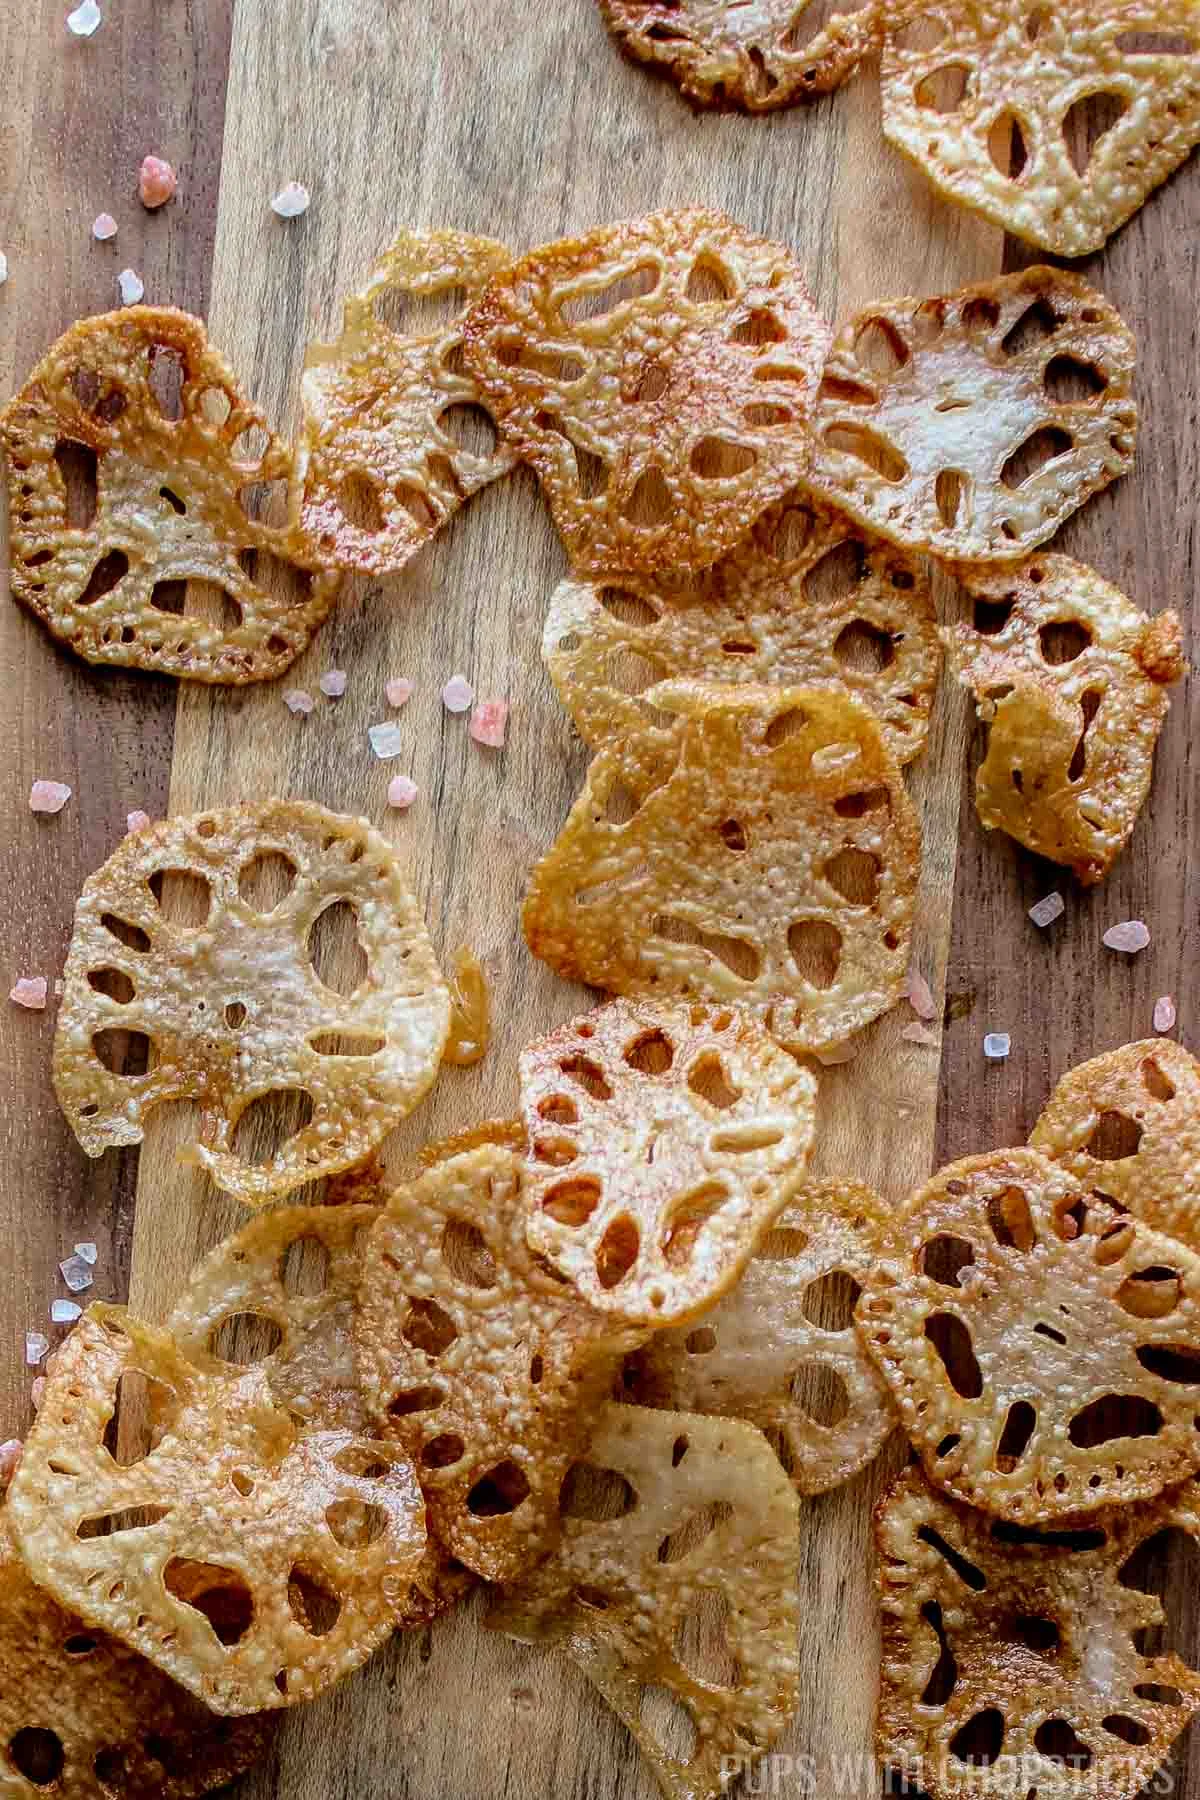
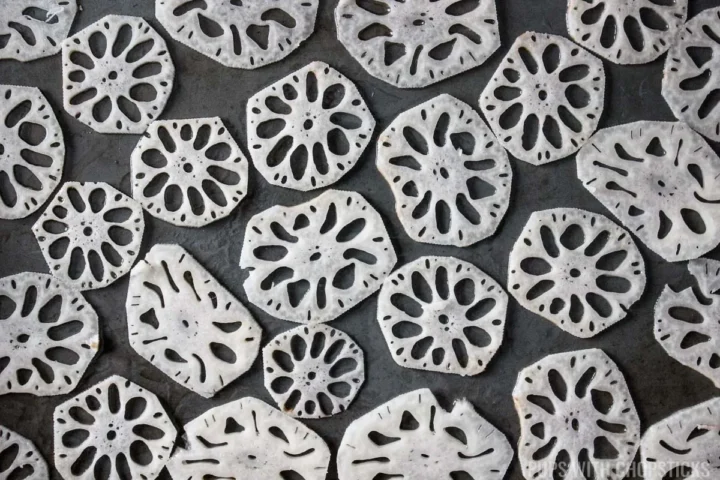
Lotus root chips, also known as renkon chips, are a savory snack made from the root of the lotus plant. The lotus root is peeled and cut into thin slices, then seasoned with salt and either baked or deep fried. The final product is a delicious, crunchy chip that might just replace your favorite bag of potato chips.
The star of this recipe is the lotus root, a versatile ingredient known for its unique flavor and crunchy texture. When sliced thin and cooked just right, it transforms into a delicious chip that's a healthier alternative to your usual snack.
Plus, when seasoned with just a touch of salt and cooked in oil, these lotus root chips are a satisfying treat that you and your family will love, especially when you toss them in furikake seasoning right out of the deep fryer!
I’ll teach you exactly how to make these delicious renkon chips, and the best part is that you can deep fry or bake them. I’ve shared both methods and what the difference is in this post.
If you're looking for something a lot more crunchier then you should definitely check out my Crispy Wonton Chips recipe which can be made with both wonton wrappers and dumpling wrappers!
Read on to learn exactly how to make this delicious lotus root chips recipe today!
What are Lotus Root Chips?
Lotus root chips, also known as renkon chips, are a popular dish in many Asian cuisines, especially in Japan.
They are made from the lotus root, which is peeled and sliced into thin pieces before being seasoned with salt and either baked or deep fried. The result is a chip with a unique, slightly sweet flavor and a crunchy texture that rivals even the best potato chips.
It’s a great recipe to try out because it introduces you to a new ingredient - the lotus root. This root has a mild flavor and a crunchy texture that is perfectly highlighted when transformed into chips. What’s best is that you can deep fry or bake them!
They’re a crispy, satisfying snack that's perfect as an appetizer, a side dish, or even a tasty treat to munch on while watching your favorite show. Trust me, you’re going to fall in love with them!
Why You’ll Love This Renkon Chips Recipe
- Easy to Make: This lotus root chips recipe only requires a handful of ingredients and a few simple steps. Whether you choose to deep fry or bake, you'll find the instructions straightforward and manageable.
- Tasty: These renkon chips are a refreshing change from regular potato chips. The unique, slightly sweet flavor of the lotus root, combined with the perfect crunch, makes these chips a delicious snack.
- Quick: From prepping the lotus root slices to the actual cooking time, this recipe doesn't take long at all. In less than half an hour, you can have a batch of crispy lotus root chips ready to serve.
Ingredients You’ll Need to Make Lotus Root Chips

- Lotus Root: The star ingredient of this recipe, lotus root has a mild flavor and a crunchy texture that becomes irresistibly crispy when deep fried. These unique looking lotus root slices taste mildly sweet when raw and just like a potato chip when deep fried.
- Salt: Salt enhances the natural flavors of the lotus root. You can enjoy these chips with just salt or add in spices such as cumin or five spice to give it a bit of oomph. To be honest, they are tasty when unsalted too.
- Oil: This is what we use to deep fry the lotus root slices and transform them into crispy lotus root chips.
Deep Fried vs Baked
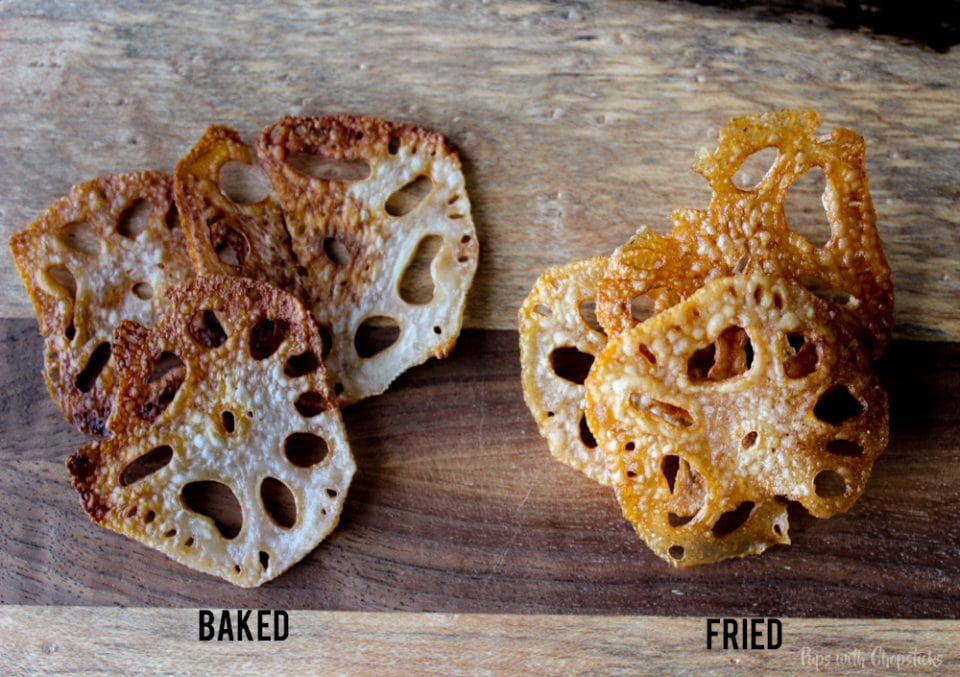
Deep frying wins this one for me. There's less baby sitting of the oven, more evenly cooked and quicker to make. I know most of us hate deep frying, but since these chips are thin you actually don't need to go nuts on the oil! 🙂 You can use a frying pan with 1 cm of oil and deep fry them in small batches.
How to Make Lotus Root Chips (Step by Step)
Making this incredible renkon chips recipe at home is super easy and will give you great results every single time. Here's how to make it step by step:
Preparation Process
Prepare the Lotus Root: Depending on your personal preference, you can either peel the lotus root or leave it unpeeled. Regardless of your choice, ensure you remove the ends of the root.
Slice the Lotus Root: Use a mandolin or a very sharp knife to slice the lotus root into ⅛ inch (3mm) slices.
Season the Slices: Lightly salt your lotus root slices. If you are baking them, be sure to oil them liberally.
Deep Frying Method
Prepare: If you're using a deep fryer, set it to 350F (176C). If you're using a stove, add approximately 1 cm of oil into the pan and set it to medium heat.
Fry the Slices: Add the slices a few at a time, taking care not to overcrowd the pan. Cook each batch for about 3 minutes or until golden brown.
Remove and Cool: Once cooked, remove the chips from the oil and allow them to cool slightly before eating. Remember, they're best enjoyed fresh!
Baking Method
Preheat the Oven: Set your oven to 400F (204C).
Prepare the Baking Sheet: Oil a baking sheet and arrange the lotus root slices on it in a single layer.
Bake the Slices: Bake for about 10 minutes or until golden brown. Keep a close eye on the oven as these chips can burn quickly.
Remove and Cool: Once the chips are done, remove them from the oven and let them cool to crisp up.
Serve Immediately: These chips are best served and eaten immediately as they don't taste as good the next day. Enjoy your homemade lotus root chips!

Joyce’s Tips For Making the Best Lotus Root Chips
- Use a Sharp Mandolin or Knife: To achieve thin and even lotus root slices, use a sharp mandolin or knife. The thinner the slices, the crispier your lotus root chips will be.
- Watch Your Frying Temperature: If you choose to deep fry your lotus root chips, maintain a medium heat. Too high a temperature will brown them too quickly and they may not achieve the desired crispy texture.
- Single Layer Baking: If you prefer to bake the lotus root chips, remember to lay them in a single layer on your baking sheets. This guarantees even baking and crisping.
- Monitor Your Oven: Keep a close eye on the oven during the baking process. Lotus root chips can burn quickly, so it is important to remove the ones that have browned and allow the others more cooking time.
- Enjoy Them Fresh: Lotus root chips are best enjoyed right after cooking. Their mild flavor and crunchy texture are most pronounced when they're fresh.
Serving Suggestions
- Lotus root chips make a fantastic appetizer along side my other favorite Japanese appetizer kani salad. Serve them with a creamy honey sesame dip, black garlic hummus or pineapple salsa to kick off your dinner party. The crunchy texture will have your guests coming back for more!
- Lotus root chips can also be used as a garnish for soups. Their mild flavor and crunchy texture add a lovely contrast to broth or creamy soups.
- If you're hosting a party, they can be a unique addition to your snack selection. Server them with garlic edamame or blistered shishito peppers! They pair well with both strong, aromatic teas and light, refreshing ones.
Recipe Variation Ideas
This delicious lotus root chips recipe is so flavorful and easy to make, you'll want to try out some of these delicious variations! Here are some great ideas:
- Spicy: For those who love a good twist, this variation will spice up your lotus root chips. Add a teaspoon of chili powder to the salt before sprinkling it on the lotus root slices. This will give your chips a spicy twist that's both exciting and addictive.
- Sweet: If you're in the mood for a sweet and salty snack, this variation is for you. After cooking your lotus root chips, dust them with a mixture of sugar and cinnamon. The sweetness of the sugar and the warm spice of the cinnamon make a delicious contrast to the saltiness and crunchy texture of the chips.
- Tangy: If you love tangy flavors, try soaking your lotus root slices in vinegared water before cooking them. This gives your chips a slight tanginess that pairs well with the salty, crunchy chips. This variation is great as an appetizer or side dish.
- Add Spices: While these chips are delicious with just salt, feel free to experiment with other spices like cumin or five spice for a unique twist to your recipe.
- Add Furikake: Right after you deep fry them (or bake them), when they are freshly hot and still moist, sprinkle on some furikake seasoning to make them even more delicious and loaded with umami!
Frequently Asked Questions
This depends on your personal preference. You can peel the lotus root if you prefer, or you can leave the skin on. Just be sure to wash the lotus root thoroughly if you plan to keep the skin on.
For the best results, use a mandolin or a very sharp knife to slice the lotus root into ⅛ inch (3mm) slices. This guarantees a consistent thickness, which is important for even cooking.
Yes, you can definitely bake the lotus root chips. Just preheat your oven to 400F (204C), oil a baking sheet, arrange the lotus root slices in a single layer, and bake for about 10 minutes or until golden brown.
Whether you're deep frying or baking the chips, you'll know they're done when they turn a beautiful golden brown color. Remember, they'll continue to brown a bit after you remove them from the heat, so pull them out just before they reach your desired level of doneness.
While these chips have a delicious mild flavor that's great with just a bit of salt, feel free to experiment with other seasonings. Spices like cumin or five spice can add an extra twist of flavor.
When deep fried, lotus root chips have a taste similar to potato chips. However, lotus root is mildly sweet when raw, adding a unique flavor profile to this fun snack.
How to Store Leftover Lotus Root Chips
Room Temperature: I highly recommend you enjoy these fresh, since they lose a bit of crispiness if it sits too long. If you must store it, place the chips in a bowl or a container with a tight lid and make sure that they are dry. Moisture is the enemy here, as it can make them soggy. If possible, place a paper towel at the bottom of the container to absorb any excess moisture.
More Snacks and Appetizers You May Like
- Korean Fried Popcorn Turkey Nuggets
- Crispy Cheung Fun (Rice Noodle Rolls) + Spicy Hoisin & Maple Sesame Sauce
- Super Easy Candied Walnuts (Sweet and Crunchy Treat!)
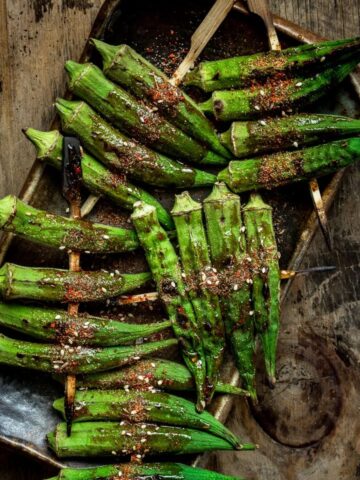
- Quick and Easy Roasted Okra (Perfect Results Every Time!)
- Buttery Scallion Pancakes
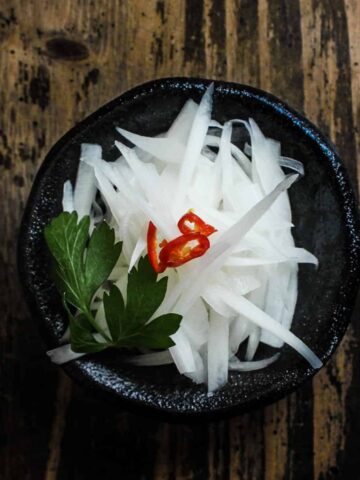
- Quick & Easy Pickled Daikon Radish
- Grilled Halloumi Cheese
- Baked Mussels with Cheese and Garlic


If you made this lotus root chips recipe, I want to see! Follow Pups with Chopsticks on Instagram, snap a photo, and tag and hashtag it with @pupswithchopsticks and #pupswithchopsticks. I love to know what you are making!
Please also consider leaving a ⭐⭐⭐⭐⭐ rating and a comment to tell me how it went! I'd love to hear from you if you made this!
If you like my recipes and want to be updated on when new ones come out, please consider subscribing to my newsletter (we don't spam) and follow along on Instagram, Facebook, and Pinterest for all of my latest recipes!
Recipe Card

Lotus Root Chips
Equipment
Joyce's Recipe Notes
- After cutting the chips, you can make them extra crispy by soaking them for a few minutes in a small bowl of water with 1 tablespoon of vinegar. Just make sure you dry them very well before deep frying them or baking them.
Ingredients
- 1 lotus root (sliced ⅛ inch thick)
- salt (to taste)
- oil
Instructions
Preparation
- Depending on your preference, peel the lotus root or leave it un-peeled.
- Remove the ends and slice the lotus root with a mandolin or a very sharp knife to ⅛ inch (3mm) slices
- Sprinkle some salt on the thinly sliced lotus roots and let it sit for 10 minutes to draw out any moisture. Pat the moisture dry with paper towel.

- Lightly salt again to add back any salt that was removed from the previous step. (If you are baking them, oil them liberally)
Deep Frying
- If you are using a deep fryer, set it to 350F (176C). If you are using the stove, add approximately 1 cm of oil into the pan and set it to medium heat.
- Add the slices a few at a time (careful not to overcrowd the pan) and cook for 3 minutes or until golden brown. (When you take them out, they will continue to brown so remove them before they get too brown)
Baking
- Set the oven to 400F (204C)
- Oil a baking sheet and put the lotus root on in a single layer.
- Bake for 10 mins or until golden brown. (Watch the oven like a hawk, every oven is set differently and these little guys burn quickly in the oven) They won't crisp evenly, so you should remove the browned ones and put the rest back into the oven.
Enjoy!
- Allow it to cool slightly before eating it, this will also make it crispier.
- Serve immediately, it's best enjoyed fresh! They don't taste as good the next day.

Nutrition
*Nutritional information is calculated using online tools and is an estimate*
Disclaimer: We are a participant in the Amazon Services LLC Associates Program, an affiliate advertising program designed to provide a means for us to earn fees by linking to Amazon.com and affiliated sites, however I provide these links to make items easier to find if you cannot purchase this locally and I would never recommend anything I don’t own myself or highly recommend. I would prefer you buy your items locally if possible to support your local shops (and chances are they are cheaper locally as well!)


heather (delicious not gorgeous) says
i recently had a few crushed on top of poke, and that texture was amazing! super light and crispy with the silky fish; i'm craving it right now! (so much so that i have plans to get poke for lunch tomorrow lol).
Joyce says
No way! That's an amazing idea! I totally didn't think of ever doing that! I bet they'd be fantastic as a crunch factor in all kinds of salads! 🙂