Sweet & tangy quick pickled daikon radish recipe with a crisp crunch! Quick & easy to make and requires no heat, just a refrigerator!
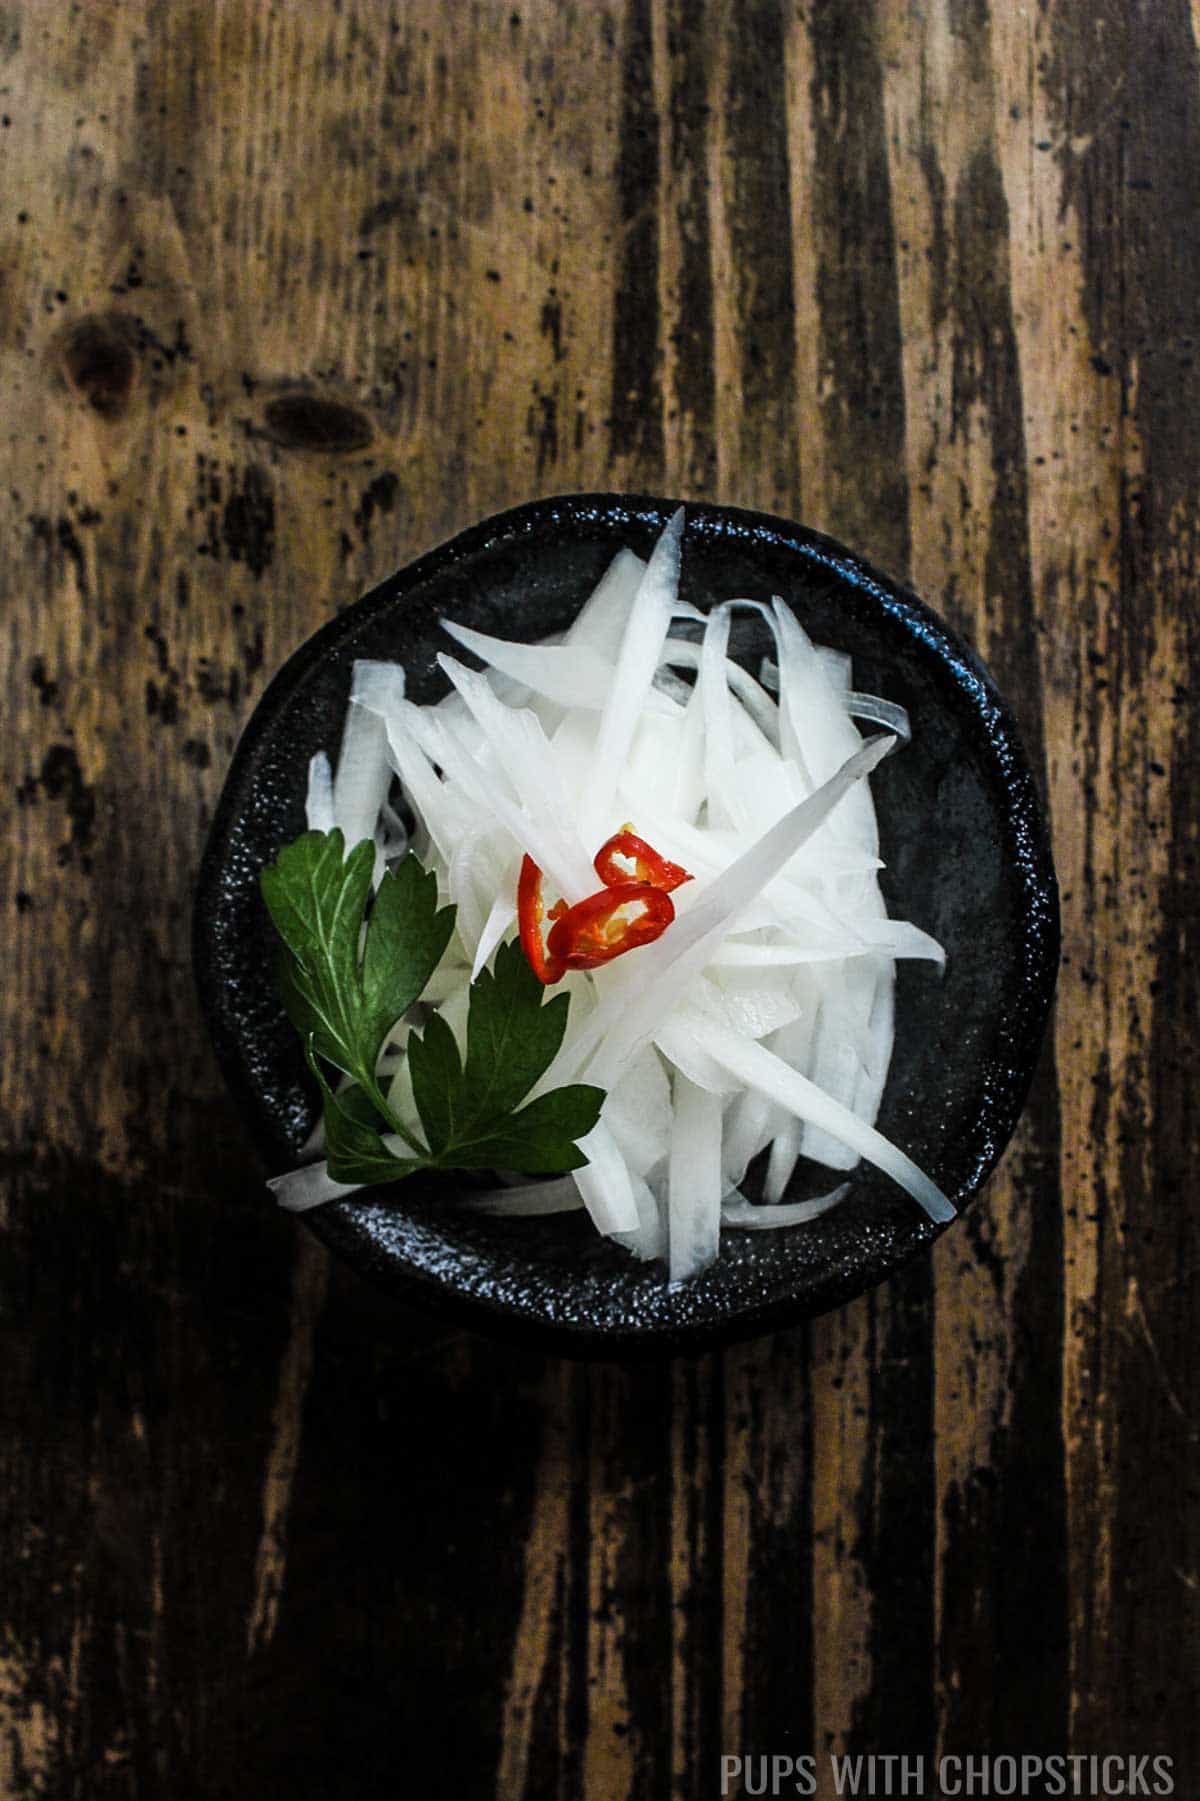
Table of Contents
- What is Pickled Daikon?
- Variations and Few Ways to Use Quick Pickled Daikon
- Ingredients for Quick Pickled Daikon
- Joyce's Daikon Radish Tips
- How to Make Pickled Daikon Radishes (Chicken Mu)
- How To Remove the Bitterness Out of Daikon Radishes
- How Long Can You Store These Quick Pickled Daikon Radishes?
- More Easy Snacks You May Like
- Recipe Card
- More Korean Recipes You May Like
What is Pickled Daikon?
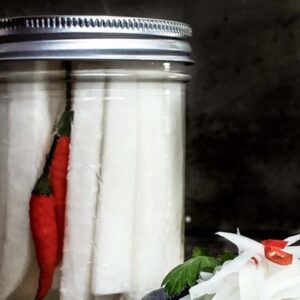
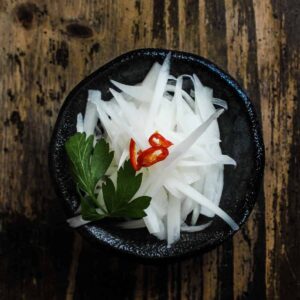
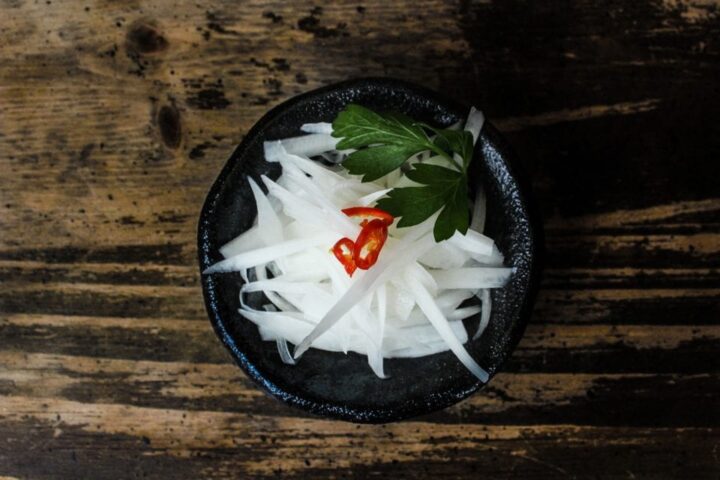
Pickled Daikon radish is a simple pickled radish dish that doesn't require any heat. They are quick and easy to make and can be ready in a few hours after it has been refrigerated, but tastes best after it has sat for 24 hours. They are sweet, and have a amazing crunch to them.
Almost every Asian culture has their own version of quick pickled daikon recipe. Koreans call it Chicken Mu, because it is a great side dish with fried chicken, Japanese have one made with sake and rice vinegar called Takuan which are dyed yellow and used in sushi, and Vietnamese have thinly sliced ones made with garlic called Do Chua! All are delicious!
There's something so satisfying about snacking on crispy sweet and sour veggies. My fridge is so full with jars of pickles and condiments, I honestly wonder how I ever have room for anything else in there.
Another delicious pickle recipe I can't get enough of is this Authentic Italian Giardiniera Recipe which makes use of fresh peppers and an assortment of veggies and is delicious on charcuterie boards.
This quick and easy pickled daikon radish recipe was inspired by the ones I love eating with Korean food. They are typically served as banchan (little Korean side dishes).
Pickles are not limited to just snacking though, I find them very versatile, here are a few different ways you can use them!
Variations and Few Ways to Use Quick Pickled Daikon
- Add carrots to make them Vietnamese style (Do Chua) - You can add finely julienne carrots and daikon to this recipe to make it a Vietnamese style (Do Chua). They are fantastic on banh mi, banh xeo, sandwiches, hotdogs, and burgers. Just make sure you squeeze out all the liquid before using it.
- Cut them into cubes and use Korean radish to make them into Korean pickled radish (Chicken Mu) - Cut them into small cubes so that they are crunchy and serve them with heavy foods like Korean fried chicken, kalbi (Grilled Korean Short Ribs) or use it as a banchan (Korean side dish). Using a Korean radish, instead of daikon would also give it a crunchier texture.
- Use rice vinegar and a bit of sake and make it Japanese pickled daikon (Tsukemono) - Adding a bit of sake and rice vinegar and chili will make it slightly spicier. I like to have it as a palate cleanser with some sushi or sashimi.
- Use Cucumbers instead - You can use cucumbers if you enjoy the fresh crunch of them!
- I like to serve this tossed in salads or noodles, I even have a watermelon feta salad that uses this pickled daikon which I find adds a nice sweet and tart flavor that balances the saltiness and sweetness from the watermelon and feta.
- You can also add quick pickled daikon radish to charcuterie platters, tacos, or fresh rice spring rolls.
- Chop it up and mix them into creamy salads (potatoes salads, tuna salads) to break up the heaviness
- Eat them as-is right out of the jar.

Ingredients for Quick Pickled Daikon

Daikon Radish - For this pickled daikon recipe, I like to use daikon radishes which I find at the Asian grocery store. That being said, I have also seen daikon radishes being sold at my local grocery stores as well. When you are shopping for daikon radishes make sure they are very firm. I like to give it a squeeze, it shouldn't be soft or bendy. The harder it is, the fresher it is. It should also be white in color, and not yellow or brown.
Sugar - Any type of sugar will work with this pickled radish recipe. I use cane sugar at home, so this is my go-to to sweeten this pickling liquid, but you can use white sugar as well. I try to stay away from brown sugars, only because it will turn the pickle brine brown.
Vinegar - I like to use white vinegar for this recipe because it's easy to find and doesn't have any extra flavors in it besides being tart, but you can also use rice vinegar as well but the pickling liquid will be slightly yellow.
Red Chilies (Optional) - If you like garlicky pickles smash a clove and put it in! If you like spicy pickles add a few chilies in! I left them whole but you can slice them up as well for a more even distribution.
Joyce's Daikon Radish Tips
- Add a slice of beet for pink-colored pickles! A little beet goes a long way, a small slice of it will be more than enough.
- If you like garlicky pickles smash a clove and put it in!
- If you like spicy pickles add a few chillis in! I left them whole but you can slice them up as well for more even distribution of heat.
- You can also use this same recipe and add some thinly shredded carrots to it to make it a Vietnamese pickled carrot and daikon dish (Do Chua).
How to Make Pickled Daikon Radishes (Chicken Mu)

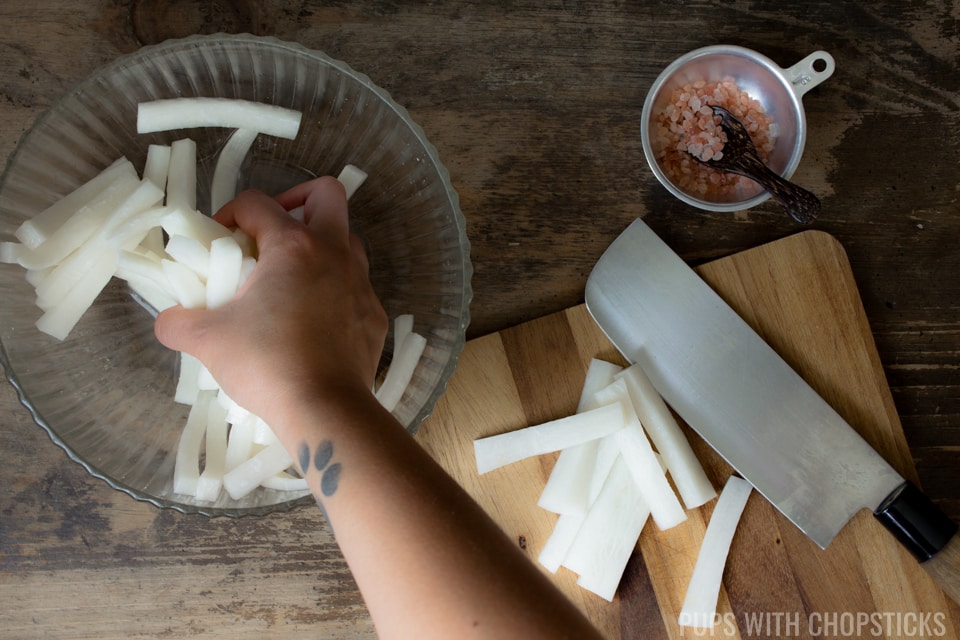
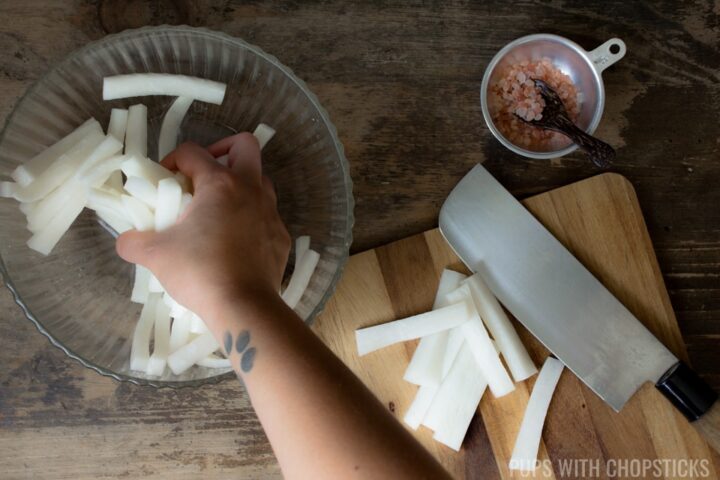
1.) Cut Them Into The Shapes & Sizes You Like
The general rule of thumb is, the thinner you cut your ingredients the faster it will pickle. However, if you plan to keep it overnight anyways then it doesn't really matter how fast it pickles!
I like to cut my daikon into long thicker rectangular shapes for pickling partially because of versatility and it's easy. You can always go from large to small but you can't go backwards.
With the thicker rectangular strips, I can choose to cut these daikon radish pickles into thin slivers for sandwiches when I'm ready to use them or I can cut them into cubes for salads or snacking. If I choose to just eat them straight out of the jar a thicker rectangular cut has a bit more crunch to it as well.

2. )Make The Pickle Brine and Add the Daikon Radish Into It
In a separate bowl, mix together all the brine ingredients (detailed ingredient amounts are in the recipe card below.) Taste the vinegar solution to see if it is sweet or tart enough for your preference.
Peel and smash 1 clove of garlic to flatten it and release the juices and put it in the brine.
Then add in the chopped daikon radish into the brine.
3.) Refrigerate For a Minimum of 4 Hours
It takes about 4 hours for the brine to penetrate the daikon radish, but it vary depending on how thick you cut the shapes. It will tastes best if you can leave it overnight.
How To Remove the Bitterness Out of Daikon Radishes
I salt my radish before I pickle it to remove the bitterness from the daikon radish.
I have noticed that depending on how fresh the white daikon is, you might produce bitter daikon pickles. The more soft and bendy (not fresh) daikon you use, the more bitter your pickles will turn out.
To work around this, since not everyone can control how fresh their daikon are, I have added a salting step to draw out the bitter water out of the daikon before we start pickling it. This extra step is definitely worth it and will give us perfect pickles every time.
How Long Can You Store These Quick Pickled Daikon Radishes?
They can be stored for about 2 months, but they taste best within a month.

More Easy Snacks You May Like
- Toasted Sesame Guacamole
- Lotus Root Chips
- Sweet and Spicy Pineapple Salsa
- Charred Lemon Garlic Edamame
- Roasted Okra
- Miso Eggplant (Nasu Dengaku) with Black Garlic
- Curtido (Salvadoran Pickled Cabbage Slaw)
If you like my recipes and want to be updated on when new ones come out, please consider subscribing to my newsletter (we don't spam) and follow along on Instagram, Facebook, and Pinterest for all of my latest recipes!
Recipe Card
Quick and Easy Pickled Daikon Radish
Joyce's Recipe Notes
- Add a slice of beet for pink coloured pickles! A little beet goes a long way, a small slice of it will be more than enough.
- You can also add carrots in addition to the daikon radish to this recipe as well.
- If you need more pickle juice, double the pickle juice portion of the recipe
- You can store these for up to 2 months, but they taste best within a month
Ingredients
- 1 small daikon radish (or Korean radish for more crunchiness)
- 1 tablespoon salt
- 1 clove garlic (Optional)
- 1-2 birdseye chili (Optional)
Vinegar Brine
- ½ cup white vinegar (or rice vinegar)
- ½ cup + 2 tablespoons hot water
- ½ cup sugar
Instructions
Preparing the Daikon Radish
- Wash and peel the daikon radish

- Cut the daikon radish to the shape you prefer. (thin match sticks, thick sticks or cubes). and put it in a large bowl.
- Add 1 tablespoon of salt and massage it into the freshly cut radish. Let the radish sit for 15 minutes while it draws out the bitter water.1 tablespoon salt
- Once 15 minutes is up, rinse the daikon well with cold water and set aside


Making the Brine
- In a separate bowl, mix together all the ingredients under the 'Vinegar Brine' and set aside. Taste the vinegar solution to see if it is sweet or tart enough for your preference.
- (Optional) Peel and smash 1 clove of garlic to flatten it and release the juices and put it in the brine1 clove garlic
Putting it Together
- Add the daikon radish into glass jars and cover with vinegar brine until the daikon is fully submerged in it.
- (Optional) If you want it garlicky or spicy, add in the optional smashed garlic and whole chili peppers into the jars as well.1-2 birdseye chili
- Seal well and let it sit in the fridge for a minimum of 2 hours but preferably 24 hours.
- Enjoy!
Nutrition
*Nutritional information is calculated using online tools and is an estimate*
Disclaimer: We are a participant in the Amazon Services LLC Associates Program, an affiliate advertising program designed to provide a means for us to earn fees by linking to Amazon.com and affiliated sites. While I appreciate the support - please try to buy your items locally if possible to support your local shops (chances are they are cheaper locally as well!) 🙂
More Korean Recipes You May Like
- Easy Japchae (Korean Glass Noodles Stir Fry)
- Tuna Mayo Deopbap (Korean Tuna Rice Bowl)
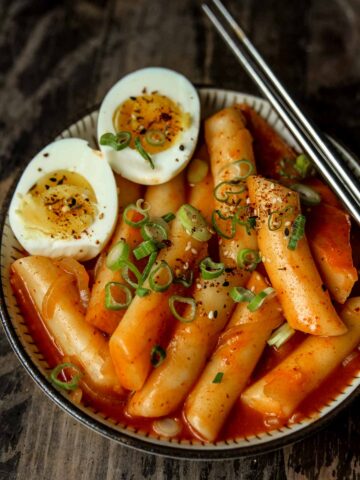
- Easy Tteokbokki (Korean Spicy Rice Cakes)
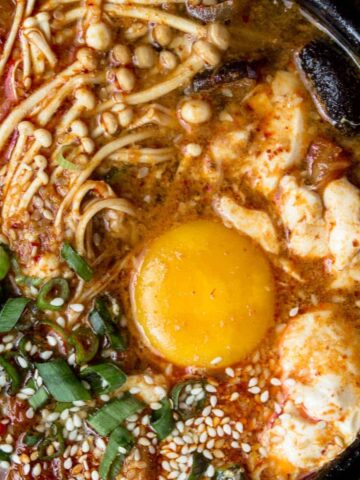
- Easy Soondubu Jjigae Recipe (Spicy Korean Soft Tofu Stew)
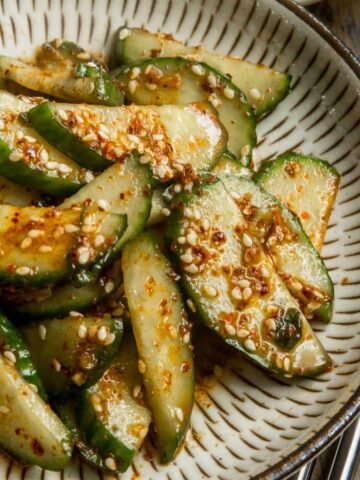
- Easy Korean Cucumber Salad (Oi Muchim)
- Spicy Pork Bulgogi (Classic Jeyuk Bokkeum Recipe)
- Korean Corn Cheese (Elote Style)
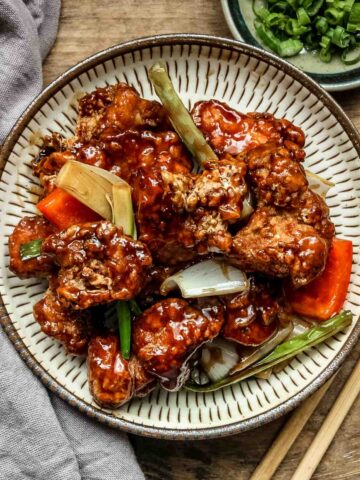
- Korean Fried Popcorn Turkey Nuggets


Iman says
Hi, I can’t wait to try the recipe. I had a salad that incorporated pickled daikon and lived it. I was wondering how to reduce the sugar though because of my blood sugar levels. Can I add monk fruit instead or is that going to change the flavor?
Joyce Lee says
Hi Iman!
Apologies for such a late reply.
This is a sweeter pickle recipe, so if you reduce the sugar it may be too sour, and the balance might be off.
Monk fruit may work but it may have a slight after taste. 🙂 I'm not sure the exact amount to substitute though, since I have never used it before.
Start with a little and do a taste test and work your way up until it taste good to you 🙂
Sorry I couldn't be more help!