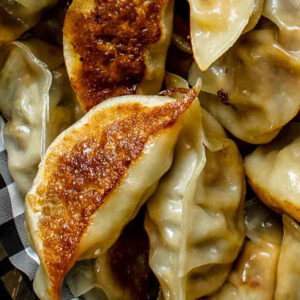
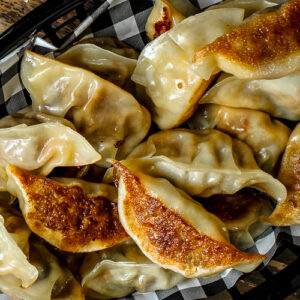
These potstickers are perfectly chewy and crispy on the outside, with a delicious juicy bacon cheeseburger filling you’ll love! The combination of savory bacon, melted gooey cheese with beef, pickles, and mustard wrapped in a crispy dumpling skin makes these cheeseburger dumplings the ultimate snack!
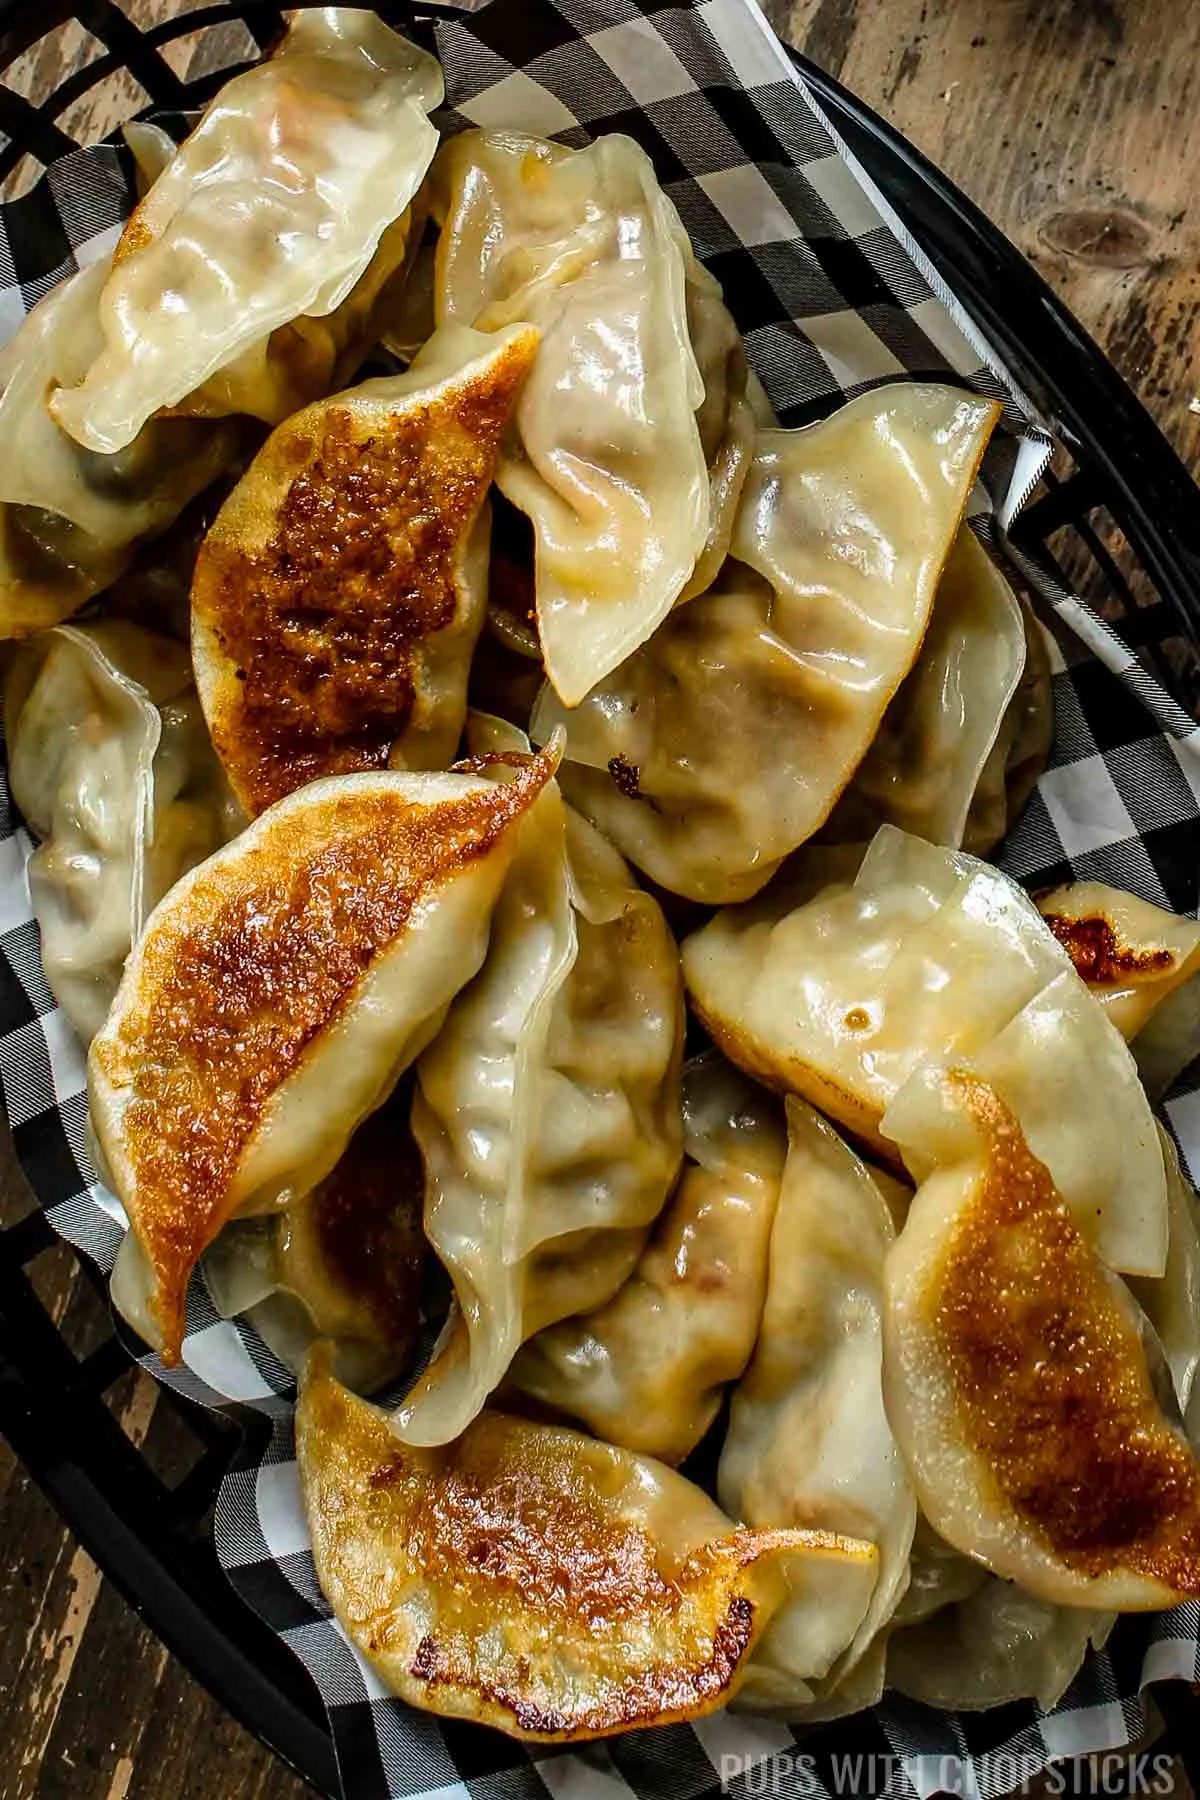
Table of Contents
- What are Potstickers?
- Why You’ll Love This Potstickers Recipe
- Ingredients You’ll Need to Make Potstickers
- How to Make Potstickers (Step by Step)
- Joyce’s Tips For Making the Best Cheeseburger Potstickers
- Serving Suggestions
- Recipe Variation Ideas for Potstickers
- Frequently Asked Questions
- How to Store Leftover Potstickers
- Recipes To Use Up Dumpling Wrappers
- More Snacks and Appetizers You May Like
- Did You Make This Recipe?
- Recipe Card
What sets this homemade potsticker recipe apart from the others is the unique blend of ingredients that create a fusion of flavors. The use of ground beef, cheddar, bacon, and miso gives a Western twist to the traditional Asian dumpling. What’s best is that these cheeseburger dumplings (aka cheeseburger gyoza) are easy enough for even first-time cooks to make!
With their delicious bacon cheeseburger filling and incredible texture, these potstickers are truly the ultimate Asian snack! Trust me, once you've tried homemade potstickers, you'll never look back!
Read on to learn exactly how to make this delicious potstickers recipe today!

What are Potstickers?
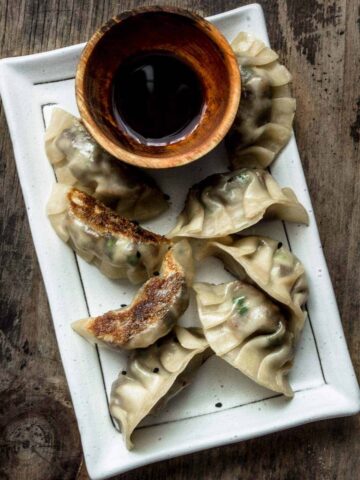
Potstickers are delicious crescent-shaped Chinese dumplings that are different from regular dumplings thanks to their cooking method. They’re first pan-fried and then steamed, and then pan-fried again which gives them a unique texture - they’re crispy and chewy on the outside with delicious filling on the inside!
The fantastic texture is what makes them so popular, and since the potsticker/dumpling skins are so widely available now, you can easily make these at home!
Why You’ll Love This Potstickers Recipe
Easy to Make: With simple ingredients like ground beef, cheddar, and bacon, and a straightforward prep time, this potsticker recipe is a breeze to whip up.
Family-Favorite: The combination of bacon, cheese, beef, and pickles wrapped in a crispy dumpling skin makes these potstickers a delicious treat that the whole family will love. It is like having a juicy little bacon cheeseburger bite in a chewy, crispy bundle!
Versatile: This recipe is versatile and can be easily tailored to suit your taste preferences. Substitute ground beef with ground chicken or shrimp, or switch up the vegetables for a different flavor profile. The dipping sauce can also be customized to your liking.
Crowd Pleaser: These potstickers are the ultimate snack for parties or gatherings. They're not only delicious but also visually appealing with their crispy golden bottoms and pleats. Serve them with your choice of sauces like mayonnaise, ketchup, or mustard, and watch them disappear in no time!
Ingredients You’ll Need to Make Potstickers
All you need are some incredibly simple, pantry-staple ingredients to make this delicious pan-fried Potstickers recipe at home.
Here's an overview of the specific ingredients for this recipe. For the exact ingredients and measurements, please scroll to the recipe card below.

- Dumpling Wrappers: These potsticker wrappers are the essential part of the potsticker recipe. They hold all the delicious fillings inside and get a nice crispy edge when you pan-fry them.
- Ground Beef: This forms the hearty, filling of our dumplings. The beef is delicious and juicy, providing a satisfying bite every time.
- Cheddar: Grated cheddar adds a layer of creamy goodness to the dumplings. It melts beautifully inside the dumpling, complimenting the beef wonderfully. I love to use marble cheddar for its gooeyness and flavor.
- Dill Pickles: Chopped dill pickles give a tangy crunch to the dumplings. They cut through the richness of the beef and cheese, adding a pop of flavor.
- Bacon: Bacon adds a smoky, savory depth to the dumplings. It pairs perfectly with the beef.
- Onions: Chopped onions add a sweet, slightly onion flavor that balances the rich meat and cheese.
- Miso: To give these dumplings a deep, umami flavor I like to use miso instead of salt. It enhances the other ingredients and adds savory and salty flavor to the beef.
- Prepared Mustard: This adds a tangy, mustard flavor to the dumplings.
How to Make Potstickers (Step by Step)
Making this incredible homemade potstickers recipe at home is super easy and will give you great results every single time. Here's how to make it step by step:
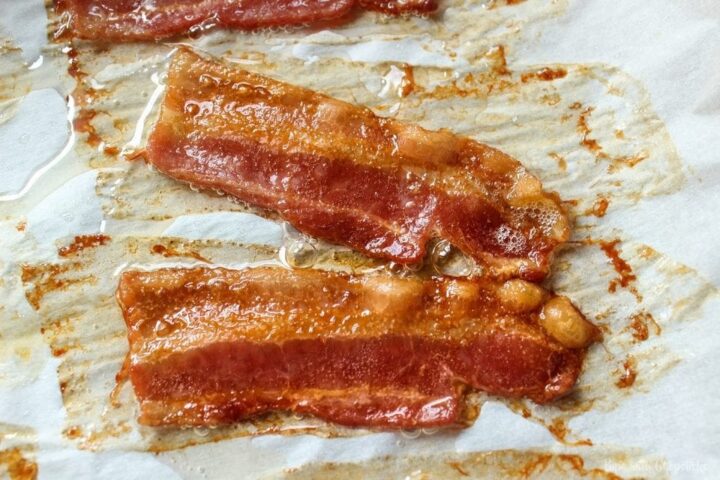
Preparing the Bacon

Pre-heat the Oven: Begin by preheating your oven to a temperature of 400 F degrees (204 C).
Prep the Bacon: Line a cookie sheet with parchment paper and place the bacon on it. Then immediately set it inside the oven. Do not wait for the oven to preheat fully. The bacon should be inside as the oven gradually reaches the set temperature.
Cook the Bacon: Set your timer for twenty minutes and let the bacon cook while you prepare the filling.
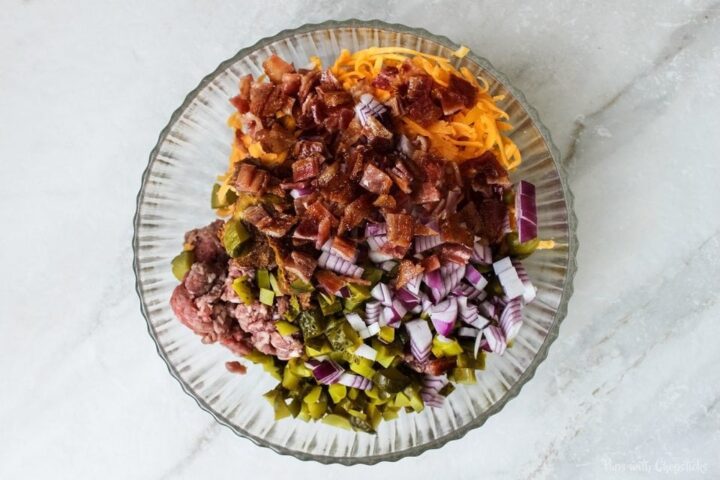
Creating the Potsticker Filling
Grate the Cheese: In order to create the filling for potstickers, first grate your cheese in a large bowl of choice.
Chop the Vegetables: Next, finely chop pickles and onions and add them to the bowl.
Add the Rest of the Ingredients: Now, combine the ground beef, miso, and mustard to the bowl.
Add the Bacon: Once the bacon is cooked and cooled, chop it up and add it to the mix.

Mix Well: Using your hands or a wooden spoon, mix all the ingredients together thoroughly.
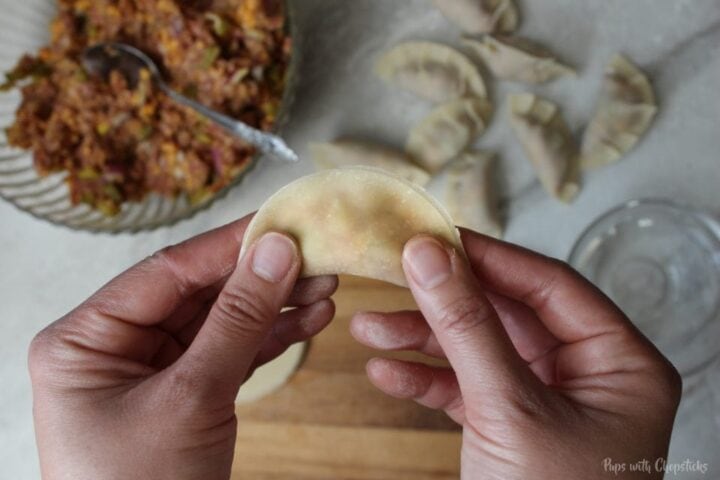
Folding the Potstickers
Prepare the 'Glue': Prepare a small bowl of water; this will serve as your "glue" for the potstickers.
Add the Filling: Place about a teaspoon of the filling onto the center of the dumpling dough, being careful not to overstuff them.
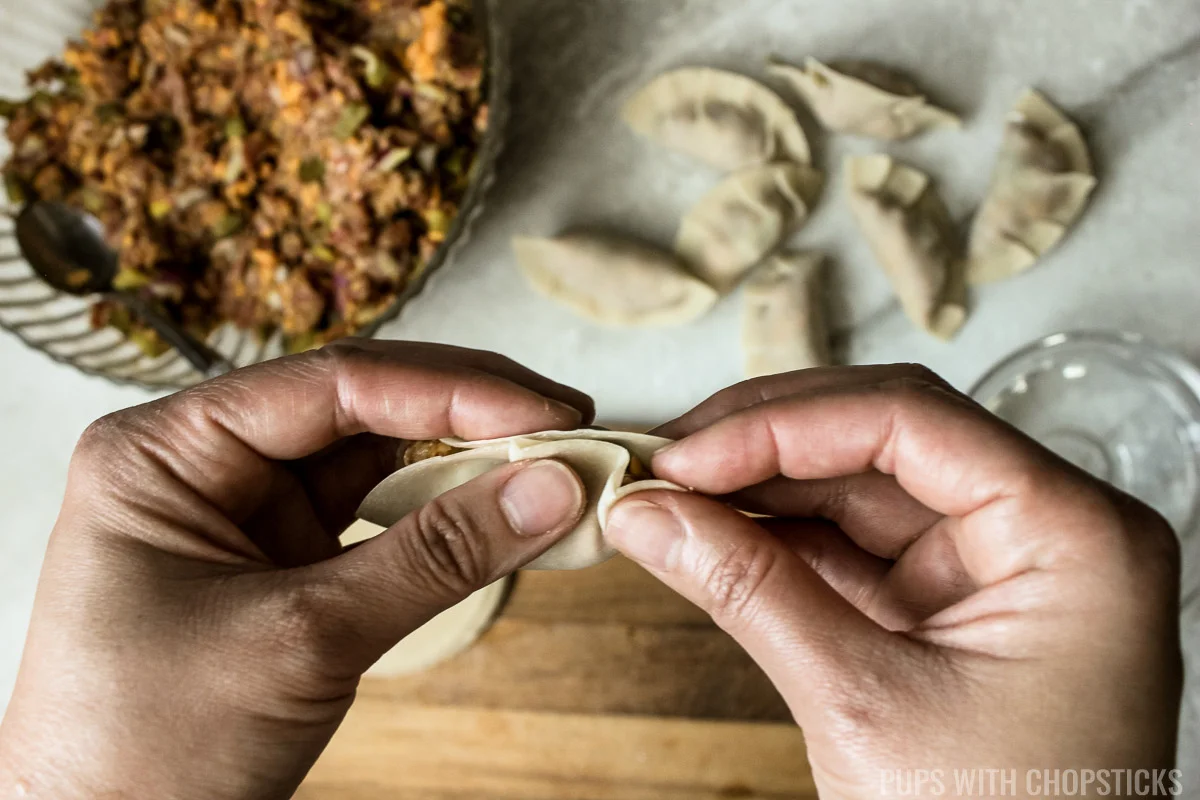
Apply the 'Glue': Wet the edges of the dough with a bit of water using your fingers.
Fold the Potstickers: Fold the dough in half, pinching the ends together to form a half-moon shape. 
For a more sophisticated, pleated look, refer to my Guide to Folding Potstickers (2 Ways) post.
Cooking the Potstickers
Preheat the Pan: Set your stove to medium-low heat and preheat your non-stick skillet. Make sure you use a non-stick skillet so that the homemade potstickers don't stick to the bottom of the pan .
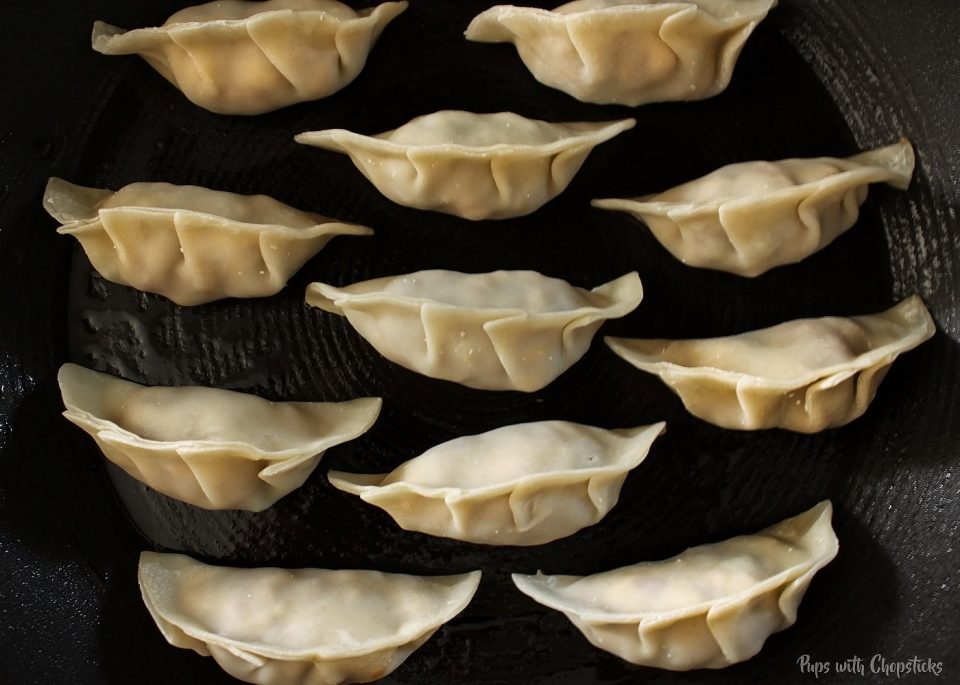
Add Oil and Potstickers: Drizzle a bit of oil onto the pan and place the dumplings in a single layer and make sure that they do not touch each other.
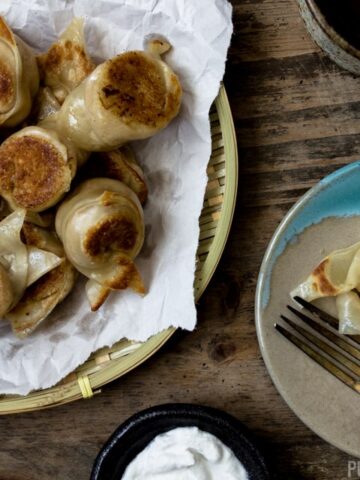
Cook Until the Bottoms are Golden Brown: Cook the dumplings for about three to four minutes or until the bottoms are golden brown and crispy.
Steam: Add a quarter cup of water to the pan and cover the pan with a lid to steam the dumplings for about four to five minutes or until the water has evaporated.
Crisp Up: Finally, remove the lid and let the dumplings cook again until the bottoms are crispy. Serve them with your favorite dipping sauce, or enjoy them as they are!

Joyce’s Tips For Making the Best Cheeseburger Potstickers
Slowly Heat the Bacon In the Oven: Set your oven to a temperature of about 400 F (204C), and then put the bacon in. Don’t preheat the oven! This slow heating process allows the bacon to cook evenly and the result is a crispy, delicious topping for your potstickers.
Don't Overstuff the Dumplings: When adding the filling to the dumpling wrappers, be careful not to overstuff them. This helps make sure that the dumplings close properly and the filling doesn't spill out during the cooking process.
Use Water as Your "Glue": A little bit of water can go a long way in sealing your dumplings. Simply dab some on the edges of your wrappers before folding them over. It is an easy and effective way to keep your potstickers intact.
Master the Half-Moon Shape: If you're new to making potstickers, start with the simple half-moon shape. Once you're comfortable with that, you can try more complex pleats. Check out my Guide to Folding Potstickers (2 Ways) post for step-by-step instructions.
Double Cook for the Perfect Texture: Start by pan-frying your potstickers until they are golden brown, then add some water and cover the skillet with a lid to steam them. Steaming it will also fully cook the insides of the dumpling. After you are done steaming, remove the lid and let the water fully evaporate, the leftover oil will continue to crisp up the bottoms again! This cooking method gives the potstickers a crispy bottom and a soft, juicy top.
Serving Suggestions
These homemade potstickers go incredibly well with other tasty appetizers and finger foods. Here are some delicious combinations I recommend trying:
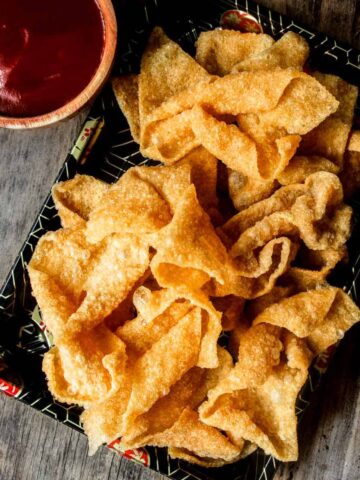
- For a crunchy contrast, consider pairing your potstickers with Crispy Fried Wonton Chips and Sweet and Sour Sauce. The crunch of the chips and the tangy sweetness of the sauce make a wonderful counterpoint to the soft, savory dumplings.
- Looking for a delightful appetizer combo? Serve these potstickers alongside Crispy Honey Garlic Ribs. The sweet and sticky ribs complement the savory potstickers perfectly, creating a flavor fusion that's hard to resist.
- For a unique and satisfying snack, try serving your potstickers with Crispy Candied Walnuts. The sweetness of the walnuts pairs beautifully with the savory potstickers, creating a delightful contrast in flavors.
- If you're a fan of Thai cuisine, why not pair your potstickers with Thai Lemongrass Larb Meatballs? The fragrant lemongrass and spicy meatballs bring out the best in the dumplings, making for a truly satisfying meal.
- For a spicy twist, serve your potstickers with Baked Crispy Stuffed Jalapeno Poppers (Crab Rangoon Style). The heat of the jalapenos and the creamy crab filling add a new dimension to the potstickers, making each bite a flavor adventure.
- If you're in the mood for a Korean treat, pair your potstickers with Korean Fried Popcorn Turkey Nuggets. The crispy nuggets and the tender dumplings create a texture contrast that's sure to please.
- For a Southeast Asian flair, serve your potstickers with a Chicken Satay Recipe with Peanut Sauce. The nutty, creamy sauce and the tender chicken satay enhance the flavors of the potstickers, making for a delicious, well-rounded meal.
Recipe Variation Ideas for Potstickers
This delicious potstickers recipe is so flavorful and easy to make, you'll want to try out some of these delicious variations! Here are some great ideas:
Asian Twist: If you love the classic taste of Asian dumplings, this variation is for you. Substitute the ground beef with ground chicken, ground pork, or shrimp and add finely chopped shiitake mushrooms, green onions, and cabbage. Season with soy sauce, ginger, and garlic for that authentic Asian flavor.
Vegetarian Delight: Who says potstickers have to be meaty? For this variation, replace the beef with a variety of finely chopped vegetables like cabbage, onions, and carrots. Add tofu for protein and flavor with soy sauce, ginger, and garlic.
Try it Spicy: Like a bit of heat? Simply add some finely chopped chili peppers to the beef mixture. You can also sprinkle some on top before pan-frying for an extra kick. This will make your potstickers spicy and exciting.

Frequently Asked Questions
You can achieve the half-moon shape by simply folding the dumpling wrapper in half over the filling and squeezing the ends together. For a more detailed guide on creating fancier pleats, refer to the Guide to Folding Potstickers (2 Ways) post.
It is best to use a non-stick skillet for cooking potstickers. This helps make sure that they do not stick to the bottom of the pan, which can lead to tearing and loss of filling.
The potstickers are cooked when their bottoms are golden brown and crispy. After pan-frying, they are steamed with a bit of water, then cooked again to crisp up.
These cheeseburger potstickers can be served with mayonnaise, ketchup, mustard, or even as-is. Their unique filling of bacon, cheese, beef, and pickles makes them a delicious snack on their own. My sweet and sour sauce goes great with them too!
How to Store Leftover Potstickers
These delicious homemade potstickers are best eaten fresh but you can also store leftovers. For refrigerating, simply place the leftover dumplings in an airtight container and make sure that they're not squashed together. You can store them in the fridge for up to three days.
When you're ready to enjoy them again, just pan-fry them on medium heat until they're heated through. You can also reheat them in an air fryer or the oven at 350F for 5-10 minutes.
Although these cheeseburger dumplings can be technically frozen, I don’t recommend freezing it after it has been cooked because the texture of the dough might change slightly after freezing.
You can freeze these raw, after you have finished folding them by placing them on a cookie tray lined with parchment for about 30 minutes to initially harden them so they don't stick together. After 30 minutes, remove them from the freezer and place them into a ziploc bag. They can be stored for up to 3 months.
To cook them from frozen, do not thaw them, just cook them with the same instructions but with more added steaming time.
Recipes To Use Up Dumpling Wrappers
More Snacks and Appetizers You May Like
- Baked Crispy Stuffed Jalapeno Poppers (Crab Rangoon Style)
- Crab and Cheese Spring Rolls
- Korean Corn Cheese (Elote Style)
- Bite-sized Crispy Honey Garlic Ribs
- Korean Fried Popcorn Turkey
- Chinese BBQ Pork (Char Siu) Dumplings
Did You Make This Recipe?
If you made this bacon cheeseburger potsticker recipe, I want to see! Follow Pups with Chopsticks on Instagram, snap a photo, and tag and hashtag it with @pupswithchopsticks and #pupswithchopsticks. I love to know what you are making!
Please also consider leaving a ⭐⭐⭐⭐⭐ rating and a comment to tell me how it went! I'd love to hear from you if you made this!
If you like my recipes and want to be updated on when new ones come out, please consider subscribing to my newsletter (we don't spam) and follow along on Instagram, Facebook, and Pinterest for all of my latest recipes!
Recipe Card
Potstickers (Bacon Cheeseburger Dumplings)
Joyce's Recipe Notes
- Slowly Heat the Bacon In the Oven: Set your oven to a temperature of about 400 F (204C), and then put the bacon in. Don’t preheat the oven! This slow heating process allows the bacon to cook evenly and the result is a crispy, delicious topping for your potstickers.
- Don't Overstuff the Dumplings: When adding the filling to the dumpling wrappers, be careful not to overstuff them. This helps make sure that the dumplings close properly and the filling doesn't spill out during the cooking process.
- Use Water as Your "Glue": A little bit of water can go a long way in sealing your dumplings. Simply dab some on the edges of your wrappers before folding them over. It is an easy and effective way to keep your potstickers intact.
- Master the Half-Moon Shape: If you're new to making potstickers, start with the simple half-moon shape. Once you're comfortable with that, you can try more complex pleats. Check out my Guide to Folding Potstickers (2 Ways) post for step-by-step instructions.
- Double Cook for the Perfect Texture: Start by pan-frying your potstickers until they are golden brown, then add some water and cover the skillet with a lid to steam them. Steaming it will also fully cook the insides of the dumpling. After you are done steaming, remove the lid and let the water fully evaporate, the leftover oil will continue to crisp up the bottoms again! This cooking method gives the potstickers a crispy bottom and a soft, juicy top.
Ingredients
- 50 dumpling wrappers
Cheeseburger Dumpling Filling
- 1 lb ground beef
- 1 cup cheddar (grated)
- ½ cup dill pickles (diced)
- 4-5 slices bacon
- 1 small onions (diced, approx ¼ cup)
- 1 ½ tablespoons miso
- 1 ½ tablespoons prepared mustard
Instructions
Preparation (Making the Bacon)
- Set your oven to 400 F (204C)
- Line a cookie sheet with parchment paper and put the bacon on it.Immediately put the tray into the oven (do not wait until it has been pre-heated, you want it to slowly reach to temperature with the bacon in there.)

- Set the timer for 20 minutes and let it cook while work on the filling
Preparation (Making the Filling)
- Grate 1 cup cheddar and add it to a large bowl
- Dice ½ cup dill pickles and 1 small onions finely and add it to bowl
- Add in 1 lb ground beef, 1 ½ tablespoons miso and 1 ½ tablespoons prepared mustard into the bowl.
- Once the bacon is done and cooled, chop it up and add it to the bowl
- Using your hands, mix everything together
Folding the Potstickers
- Get a small bowl of water, this will be the “glue” for the potstickers
- Add about 1 tsp of filling onto the middle of the skins. Careful not to over stuff them
- On the edges of the potstickers apply a bit of water with your fingers
- The simplest way to fold these without going all fancy on pleats is just folding them in half and squeezing the ends together to form a half moon. (For a quick guide on 'how to' create the fancier pleats, refer to my dumpling folding post.)
Cooking the Potstickers
- Set the stove to medium-low heat to pre-heat your non-stick frying pan. To see if the frying pan has come to temperature, add a few drops of water. If it sizzles and evaporates you’re good to go. IMPORTANT: Use a non-stick pan so that the potstickers do not stick to the bottom of the pan.
- Add a bit of oil on the pan
- Place the dumplings in a single layer, making sure they are not touching each other.

- Cook them for about 3-4 minutes or until the bottoms are golden brown and crispy looking
- Once they are brown, add ¼ cup of water into the pan and put a lid on it.Steam it for 4-5 minutes or until the water has evaporated
- Once we are done steaming, remove the lid and let it crisp up for 1-2 minutes. Around this time I carefully peel them off the frying pan to make sure they are not stuck to the pan and then continue to brown them until the bottoms are crispy again.
- Serve them with mayonnaise, ketchup, mustard – or have them as-is!


Nutrition
*Nutritional information is calculated using online tools and is an estimate*
Disclaimer: We are a participant in the Amazon Services LLC Associates Program, an affiliate advertising program designed to provide a means for us to earn fees by linking to Amazon.com and affiliated sites, however I provide these links to make items easier to find if you cannot purchase this locally and I would never recommend anything I don’t own myself or highly recommend. I would prefer you buy your items locally if possible to support your local shops (and chances are they are cheaper locally as well!)

Lillian says
I love these so much! I was a bit skeptical on how they would turn out the very first time I tried it, but it was amazinngggg! I’ve made them a couple times now, and plan on keeping this recipe for a very long time!!!
Joyce Lee says
Hi Lillian!
I'm so happy you liked this!! I love this recipe so much too! It's easier than eating a hamburger! haha!
Since they are a bit time consuming, you can pre-make a bunch of them and freeze them so you always have a batch in the freezer! When you freeze them for the first hour, make sure none of the dumplings are touching so they don't stick together. I like to place them on a tray on parchment paper in the freezer for an hour or two, then they are a bit stiff, I add them all into a ziploc bag together.
Steve K. says
Is the ground beef raw or cooked when it's added with the other filling ingredients?
Joyce Lee says
Hi Steve!
It is raw ground beef.
Sweet William says
You Have inspired me to try new stuff . I just spent all day making my own wrappers, solid broth, Hand chopping everything. I love it . Then I seen this oh my goodness. I love cheesy hamburgers.
Thank you Where ever you are 🙂
Jacqueline Wong says
Can't wait to try this. Can these be made and frozen or do they need to be fried on the same day? Have you tried freezing them?
Joyce says
Hi Jacqueline!
That is a very good question! I haven't actually tried freezing this particular recipe but I have froze many other dumplings and I can't see why you can't freeze this. I say go for it! 🙂
When you freeze it, to prevent them from sticking together I like to pre-freeze it by using a cookie sheet with a piece or parchment/wax paper on the bottom.
Make sure to spread each dumpling apart so they aren't touching, then freeze it for about 30 minutes to 1 hour (or until they are firm and semi frozen to frozen. Then I put them all in a ziploc freezer bag and store the bag in the freezer! 🙂
To cook them (from frozen) I use the same steps as I have in the recipe but cook them slightly longer during the steaming and crisping step near the end to make sure they are cooked all the way through.
Hope this helps! and hope you enjoy these!
Joyce